Ziti, Eggplant, Sun-dried Tomatoes & More - Pasta Sunday

final.ziti.jpg

Sure, I recognize that Cinco de Mayo is coming up, and maybe you were expecting a taco or fajita recipe.  I'm figuring... No, I'd bet the farm that there are a gazillion other sites that will provide you with oodles of Mexican celebratory dishes.  I like Mexican food but I'm Italian (well, as we all know now with 1/4 Polish, shhh). Plus, you're gonna need a dish for  Sunday.

What can I tell you?  I'm a creature of habit and I love me some pasta on a Sunday. Well, any day really, but Sundays are a must. And it's usually the kind of pasta dish where I'm just throwing together things that I unearth from the back of the fridge or from a pantry rummage.  As my grandmother, who didn't quite understand my need for experimentation, used to call it, Mescolanza. Roughly translated; 'mixed up mess' which doesn't sound very appealing, right?  Consequently, the need for another title was apparent.  Thus the renaming of these types of creations to Something from Nothing Specials was born. Although not super sexy, it does sounds more creative and less like a mistake.  I have to admit, with some pride, that I can't recall a time when I experimented with pasta and it didn't taste good.  Could bias play a role by sheer virtue that I crave pasta like a smoker craves nicotine? Sure, but I have confirmation from others that they like my creations, too.   

So this past Sunday began a bit slow and lazy. When I woke up I had in the back of my mind that it was a pasta day. Although Spring had been trying to eek its pretty little neck out, this particular day was quite chilly, and even a bit nasty. Pasta always warms my soul and my belly. Heck, who am I kidding?  It's Sunday. I don't need any other excuse to make pasta.  So, after doing some Spring cleaning, my reward was to whip me up some comfort and serve it up like a trophy for my work. (I think I might have a serious pasta problem.)

Sure, I had fresh tomatoes.  I even had mushrooms. But that big, hunking jar of sun-dried tomatoes was staring me down as I opened the refrigerator door.  Those jewel colored, intensely flavored bites reminded me of how often I cooked with them in Miami. I was immediately transported back with memory waves of the other ingredients that were my favs: artichoke hearts, capers and olives.  Always trying to keep some solid staples on hand, of course I had capers and olives at the ready.  But with artichokes in attendance, it seemed imperative that I resurrect an old dish.  Also making an appearance, but as a new addition were some baby Italian eggplant. Throw in a few aromatics and we have a pasta dish, y'all.  

The main line up.

The main line up.

Ingredients

1 lb pasta (I used gluten free Tinkyada ziti but use whatever you like)
3 small Italian eggplant, cut in 1/2" strips (approx. 4 c)
1 c artichoke hearts, quarters
1/4 c sun-dried tomatoes, chopped
1 medium yellow onion, sliced (approx. 1.5c)
2 T Kalamata Olives
3 large garlic cloves, sliced
1.5 T capers
3 T olive oil
1/2 -1 t salt
1/2 t red pepper flakes
2 c basil, chiffonade
Goat or Feta cheese, or Pesto, optional


onions.garlic.jpg

Instructions

Put a pot of salted water to boil for the pasta. Sauté the onions in oil, adding 1/2 t salt and red pepper over low heat.  Let soften while you slice the eggplant and garlic. 

egpplant.slices.jpg
eggplant.strips.jpg

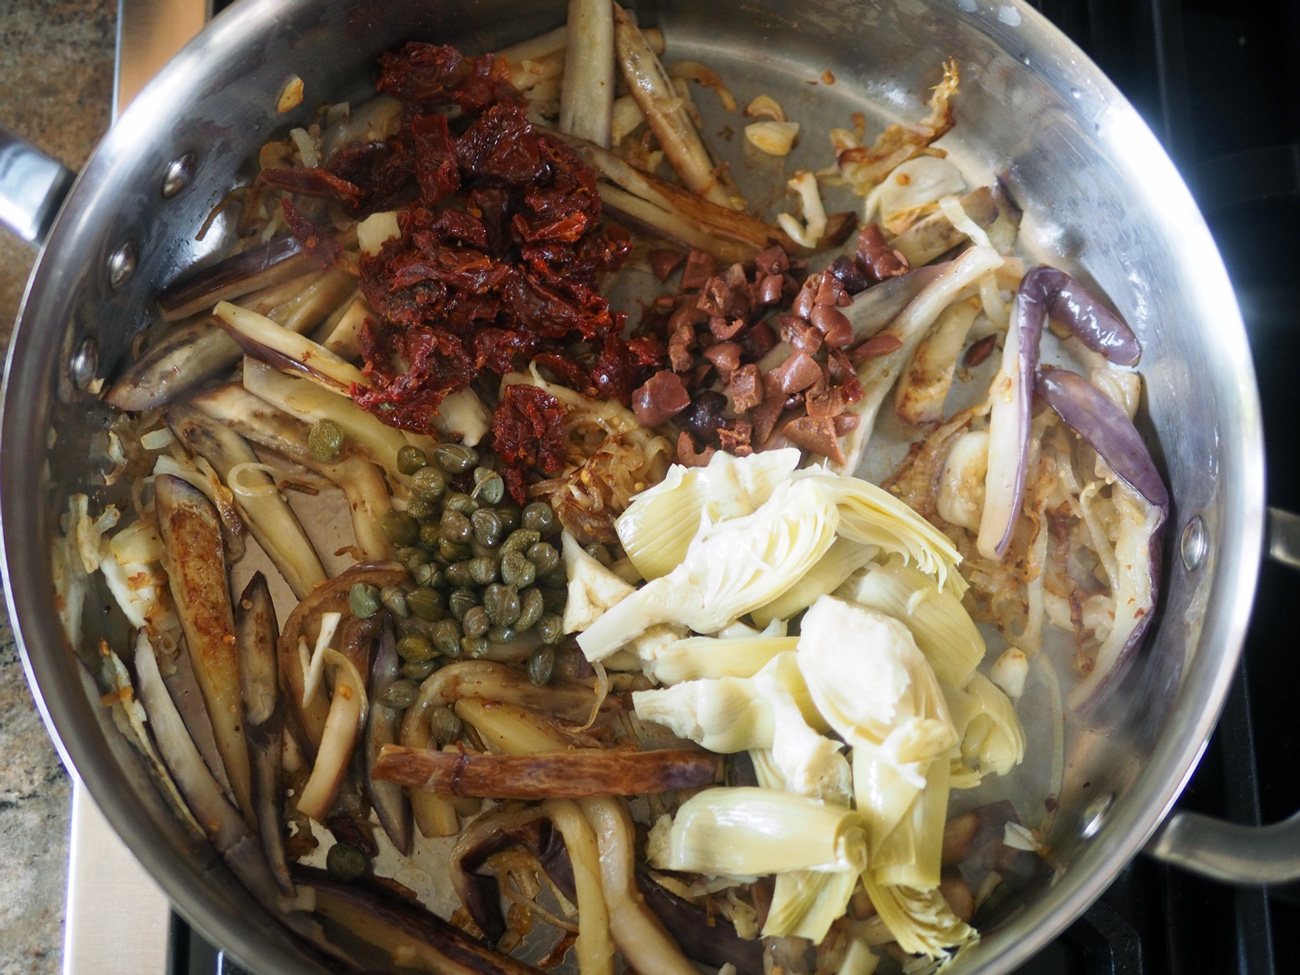
Add the eggplant and slightly raise the flame to medium low.  You want to brown the eggplant a bit.  While the eggplant is cooking, prep all the remaining ingredients, and add the pasta to the boiling pot. Once the eggplant has browned, add a tad more oil in the middle of the pan to cook the garlic. Then add the capers, olives, sun-dried tomatoes and artichoke hearts.  Lower the heat and let warm through. At this point, give it a taste for seasoning.  Capers, olives and sun-dried tomatoes can be salty which is why I only started with 1/2 t salt to start, and then added another 1/2 t before adding the pasta. 

It's important to not overcook the garlic, so only add that once the onions and eggplant are browned.

It's important to not overcook the garlic, so only add that once the onions and eggplant are browned.

The aromatic line up: Sun-dried tomatoes, capers, Kalamata olives, artichoke hearts.(Notice I only had a few olives, so that's the amount I used.)

The aromatic line up: Sun-dried tomatoes, capers, Kalamata olives, artichoke hearts.(Notice I only had a few olives, so that's the amount I used.)

Add them all to the pan so they cozy up together.

Add them all to the pan so they cozy up together.

By this time the pasta should be ready.  Reserve some of the pasta water, then drain the rest.  Add the pasta to sauce pot, stir together.  Add the pasta water as needed to loosen up. Turn off the heat and add the basil.  Serve immediately. 

Add the pasta to the mix and stir together. Now is the time to add the pasta water to your liking.

Add the pasta to the mix and stir together. Now is the time to add the pasta water to your liking.

Add the basil at the end to keep it from cooking all the way through.

Add the basil at the end to keep it from cooking all the way through.

Grate some cheese over top.  This dish would also be delicious with chunks of feta or goat cheese stirred in. I didn't have either but can completely imagine and taste it in my mind.  

final.pasta.cu.jpg
fresh.basil.jpg

Since I had so much basil, I made walnut pesto which I used to warm up the leftover pasta.  Let me tell you that was a winning combination.

Happy Sunday or any day.

Print Friendly Recipe


DP-stirredwlove-ID1.jpg

White Bean Dip

final.dip.jpg

I am a serial food pleaser. I caught the entertaining bug from my grandmothers and mother while watching them put out dish after dish, platter after platter for holiday events, Saturday BBQs, or a Sunday meal.  There was something about those moments that dug in deep with me.  Preparing and offering up food made with love seemed to awaken a real joy in me. I loved the excitement of it. I love the way it makes me feel. Entertaining is part of my DNA...DANA. 

In my parent's kitchen on Long Island with sumo sized vats of food. Yes, I say from WAY back. That was my brother's bird named Qubiert.

In my parent's kitchen on Long Island with sumo sized vats of food. Yes, I say from WAY back. That was my brother's bird named Qubiert.

Part of my High School gang. I guess I convinced them with more than just wine and cheese. It took 16oz Buds!

Part of my High School gang. I guess I convinced them with more than just wine and cheese. It took 16oz Buds!

From way back when, luring friends and family to come over to nibble on my food experiments has been a constant agenda. I giggle at the memories of my high school years when I would try to convince my friends to gather at my house for wine, cheese and board games instead of their suggestion to go to a bar.  Nerd, or early onset foodie? Either way, it was and still holds true. Given the choice, I much prefer hosting a small gathering than going out.  Seeing as it's been a while since I've used my usual bullet point list, here goes a few reasons to entertain at home:

  • Your guests can stay as long as they like, no one hovering over with a check waiting to seat the next group

  • You can make whatever food you like, and experiment and use them as test subjects

  • You don't spend nearly as much as in a restaurant

  • You don't have to deal with a bunch of people who aren't part of your group

  • You can laugh and dance and play whatever music you want

  • You can move around from room to room, sit on the floor or lie on the couch or be outdoors

  • You can display all your table decorating talents

  • You can wear comfy clothes

  • You can kick your shoes off, although I never do

When I lived in a studio apartment in NYC, my entertaining was contained to having a friend or two over for dinner.  After moving to Miami, I had the space to entertain but with crazy work hours, I barely had the time.  Go figure!  I was left with one option to soothe my aching entertaining soul.  Throw myself birthday parties.  I knew I could at least carve out time for my own birthday, and I also knew friends would make the effort because of that.  Buffet style was mostly how these shindigs went down.  It made it easy to put all the food out and have people fill and refill as they wished, at their pace.  Less fussy that way, too, kept the mood relaxed, informal and moveable.  You've heard me talk about the importance of having some food cold, some room temp and 1-2 options warm.  With these annual parties the guest list was usually my same dear friends. That meant I needed to come up with food ideas that would check all those boxes and as well as be different from the previous year. 

Friends always willing to help. Yay, for me.

Friends always willing to help. Yay, for me.

Dear friends that I still have as a part of my life to this day.

Dear friends that I still have as a part of my life to this day.

My dear friends: Kathy, who sadly is no longer with us, me, Emilce and Helene. Can I blow them out? Sure, I've got plenty of hot air.

My dear friends: Kathy, who sadly is no longer with us, me, Emilce and Helene. Can I blow them out? Sure, I've got plenty of hot air.

I promise to post more of those old favorites in upcoming posts, but today I want to share a white bean dip.  Reason being is that I recently revived this recipe during our latest trip to Miami.  So, it seems only fitting having first made it decades ago in Miami.

While on this trip, we had a few people over our apartment.  Perfect time to feed my need to 'food please'. So I whipped up a few bites.  JC always laughs because he says, "No, biggie we can just put out some cheese" and then I decide we need a few other nibbles, and in a flash we have a spread of food.  

I'm as comfortable as can be in George and John's kitchen.

I'm as comfortable as can be in George and John's kitchen.

On our last night of this past trip we were invited to our friends', John and George, house for dinner.  We  adore them for many reasons but are belly tickled that they are food lovers as well.  We make a perfect complement in the kitchen together.  Their part: the main meal. Our part: the appetizers.

Making the potato topped with with smoked trout & sour cream

Making the potato topped with with smoked trout & sour cream

You don't always have to make all the dishes. Sometimes buying really good prepared foods is just the right answer. Marinated olives & feta.

You don't always have to make all the dishes. Sometimes buying really good prepared foods is just the right answer. Marinated olives & feta.

Leftover heirloom tomatoes from the night before...

Leftover heirloom tomatoes from the night before...

Cut up to make the topping for bruschetta.

Cut up to make the topping for bruschetta.

Talk about an excellent time to revive an old dip. This task was also going to require me tapping into my something from nothing style as we only had a few food items left in our apartment due to our return to NY.  Time to whip up what's available.  I had made the potatoes topped with trout and had extra, so that was on app down.  I had leftover heirloom tomatoes, chopped up made a tasty bruschetta. Lastly, in the cupboard... white beans.  In the fridge, standing by wanting to be needed: scallions and cilantro at your service. Perfect aromatics to jazz up a white bean dip. 

This is a dip that can be modified to use what you have available or what flavor profile you like.  Clearly, not a lot is needed to create this one. You can use a different kind of bean, or basil instead of cilantro. Mix and match to what you have, or whatever will rock your taste buds.

Only a handful of ingredients, so make sure they are fresh.

Only a handful of ingredients, so make sure they are fresh.

Chopped garlic

Chopped garlic

Ingredients

1 15 oz can Cannellini or Great Northern beans
1/3 c cilantro (plus extra for garnish)
2 T lemon juice
2-3 cloves of garlic
1 T olive oil
1/2 t salt
1/8 t pepper
1/3 c scallions, sliced (plus extra for garnish)

Instructions

Drain the liquid from the beans reserving 1 T.  Place the beans, garlic, salt, pepper, oil, lemon juice in a mini food processor.  I used a blender because it was all I had, but found it didn't chop as well as I would have liked.  Buzz them up to your liking.  You can make this dip super smooth and creamy, or leave it a little chunky.  I like it both ways.


Remove this mixture and place in a decorative bowl.  In same blender, add the scallions, cilantro and reserved bean liquid.  Buzz until you get a chopped mixture.  Dollop this mixture in the center of the bean mixture.  Then slice a few more scallions and cilantro and sprinkle on top.  Serve with crusty bread or vegetables like cucumber slices, celery, carrots, or even blanched broccoli.  

blended.dip.jpg
Dollop the scallion, cilantro mixture on top.

Dollop the scallion, cilantro mixture on top.

My appetizer offerings make with love part in our Miami home, part in theirs.

My appetizer offerings make with love part in our Miami home, part in theirs.

All of the appetizers were a big hit at our friends' house. But the dip got the most ohhs and ahhs. I almost felt I should have made more!  John's sister loved it so much she kept asking for the recipe. Hey, guess what? I have a blog just for that reason.  So, here you go Ann, and for all of you who might enjoy this super simple dip that will please your own guests, or bring to a party and please other guests.  Either way, a crowd pleaser.

Pierogi - The Polish Ravioli

final.pierogi2.jpg

Truth be told, I'm only 3/4 Italian. The remaining 1/4 comes from my Polish grandfather on my mother's side.  His mom only spoke Polish and made all sorts of traditional dishes.  Gołąbki, Kabusta, Kielbasa, and the all time favorite, Pierogi.  Seriously, who wouldn't love a big ravioli style dumpling stuffed with potato, onion and cheese?  Who, I ask?  If you say no, keep it to yourself.  You're in the minority.

My beautiful Italian grandmother married a handsome, blond hair, blue eyed Polish man who was the most gentle, lovable soul. He was adored by all, but especially by her.  I'm just spit balling here, but I image those blue eyes and big smile charmed her into learning how to make all those familiar and delicious dishes.  As they say, a way to a man's heart is through his stomach. And so this polish dish was then passed on and loved by a big Italian family.

After decades of marriage, she was still sitting on his lap, full of smiles as they shared food, laughter and love with family. Those smiles tell the story. Photo credit: Paul Majewski

After decades of marriage, she was still sitting on his lap, full of smiles as they shared food, laughter and love with family. Those smiles tell the story. Photo credit: Paul Majewski

LOVE, LOVE, yes, stirred with LOVE.

LOVE, LOVE, yes, stirred with LOVE.

My twin sisters, Alyssa and Jill. Mom always dressed them in the same outfits. I love that being out in the 'country' turned them into barefoot, wilderness adventurers.

My twin sisters, Alyssa and Jill. Mom always dressed them in the same outfits. I love that being out in the 'country' turned them into barefoot, wilderness adventurers.

Making Pierogis was like a team sport
when we were growing up.  I can
remember going to my great aunt's
house way out on Long Island. Which seemed like a long drive from Brooklyn,
but when you are a kid everything seems bigger or longer.  Although, it was pretty far out on the Island. Living in the city, we didn't have big yard. It was a path of concrete with rose bushes and fig trees on either side.  It certainly was not big enough for a swing set. So when we were out in the country we took full advantage of the outdoors and the playthings. All the kids would run around the yard while the adults made the meals.


Every now and again we would sneak into the kitchen to watch the elder stateswomen rolling, stuffing, boiling up hundreds of Pierogis as we anxiously awaited the potato filled platter to hit the table.  We even had a contest to see who could eat the most.  It was reminiscent of Cool Hand Luke pounding down hard boiled eggs!  Only eating Pierogis was, and still is, way more enjoyable.  

My great Aunt Ann Photo credit: Paul Majewski

My great Aunt Ann Photo credit: Paul Majewski

My Grandmother Photo credit: Paul Majewski

My Grandmother Photo credit: Paul Majewski

After my grandmother passed away, making these belly filling dumplings took a hiatus in our house.  That is until my sister, Alyssa asked my mom if they could make them together.  For whatever reason, I have not been around during these sessions.  So, I was thrilled that this year I was in town when they decided to make them again.  

When my sister and I arrived at our parents' house we found our mom already deep into the preparation.  She had peeled, boiled, mashed and already made the potato mixture.  And was wrist deep into dough mixture. Oh well, so much for all the usual prep photos of each stage.  Sorry, blame it on my mom, who seemingly couldn't wait for our grand entrance. We took off our coats, plopped our shit down and dove right in.  (Yes, I washed my hands first, in case you were wondering.)

Happily mixing the dough. Don't you just love that smile. Reminds me of the above photo of her mother sitting on her dad's lap.

Happily mixing the dough. Don't you just love that smile. Reminds me of the above photo of her mother sitting on her dad's lap.

It is a fairly simple recipe but rolling out, stuffing and pinching the Pierogi to perfection does take practice.  The good thing about these carb bombs is they taste just as delicious no matter what they look like.  Another valuable point to note, they wouldn't be so labor intensive if you only made a 1/4 of the recipe. The amounts given below make 60 pierogis.  Unless you are feeding a Polish army, you won't need that many.  Although, if you are going through the effort, I say, go ahead and make the whole amount, freeze them, and enjoy them at a later date.  Which is what we did.


Ingredients

Filling
5 lbs potatoes, peeled and cubed
1/2 lb cream cheese
1 onion, fine chop
1-2 T butter
Salt

Dough
6 cups flour
1 large egg
2 cups warm water
1 T butter
Salt

6-8 T melted butter for the finishing sauce

My mom spelled pierogi incorrectly but I love seeing her handwritten recipes.

My mom spelled pierogi incorrectly but I love seeing her handwritten recipes.

Instructions

Peel and cube the potatoes, then boil them in salted water until soft.  While the potatoes are cooking, sauté the onions in butter just until soft and translucent.  When the potatoes are done, drain, mash and let cool.  Then add the onions, cream cheese and salt to taste.  Make the dough by combining the flour, egg, water, salt and butter together.  

It starts out like any dough, rough and not pulled together yet.

It starts out like any dough, rough and not pulled together yet.

Knead the dough until it is smooth.  You may need to add sprinkles of flour if it's too sticky, but add sparingly.

Keep kneading until smooth. Mom needed a rest.

Keep kneading until smooth. Mom needed a rest.

It's important to get it smooth.  Mom needed a break so I took over the kneading to get it to the finish line. By now, I have a ton of experience in dough kneading. That was not always the case.  It took years before my grandmother would allow me to touch any dough, but then I graduated to bringing it to the finish line. On the job training that I hope to pass off to my nieces and nephew.

I took over to get it to a smooth consistency.

I took over to get it to a smooth consistency.

With the dough soft and smooth as a baby's bottom, cut a small piece, roll into a thick rope, then cut 1.5" pieces. Roll each one out creating a small round about the size of your palm, approximately 3.5" diameter.  Then take a full tablespoon of the potato filling and place in the middle. 

A nice round dough waiting to be filled.

A nice round dough waiting to be filled.

Place a heaping tablespoon in the center of the round. Take note of the small cut piece. That is the size before being rolled out.

Place a heaping tablespoon in the center of the round. Take note of the small cut piece. That is the size before being rolled out.

It may seem like a lot of filling but they should be completely filled with the potato mixture. If it seems too much, simply stretch the dough to close.

It may seem like a lot of filling but they should be completely filled with the potato mixture. If it seems too much, simply stretch the dough to close.

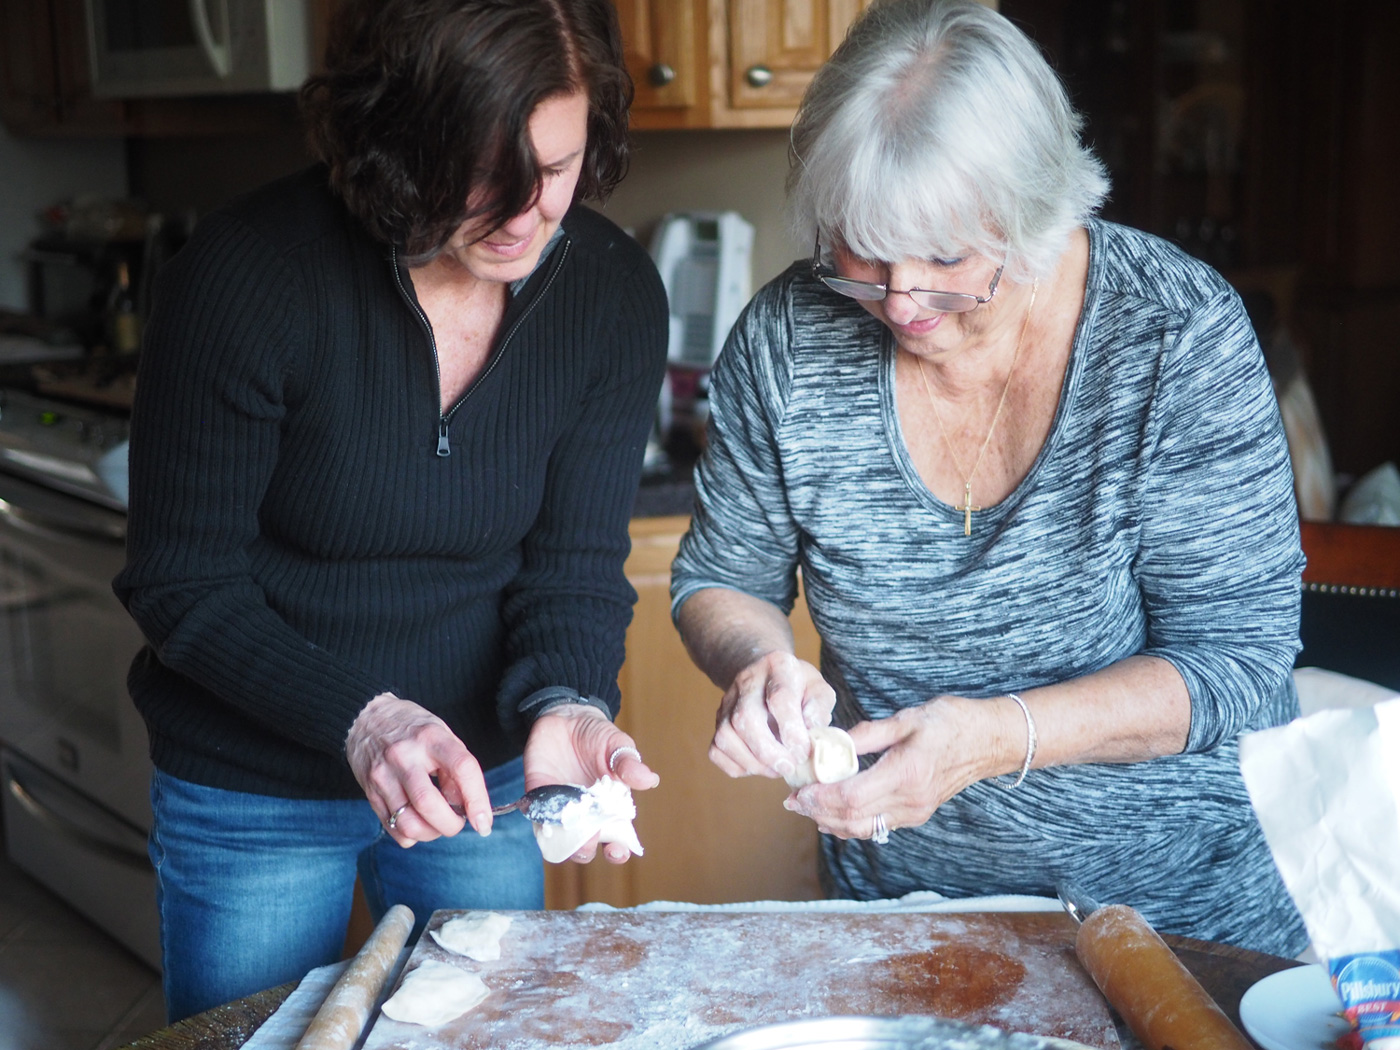
Fold in half and crimp the edges, pressing flour into them.  Place them on a dry towel until all are made and you are ready to boil them. 

Team effort is the only way to make 60 pierogi unless you have time.

Team effort is the only way to make 60 pierogi unless you have time.

Alyssa and Mom happily making, and anticipating the finished product. Is there anything more heartwarming than keeping traditions alive with your mom? I don't think so.

Alyssa and Mom happily making, and anticipating the finished product. Is there anything more heartwarming than keeping traditions alive with your mom? I don't think so.

Perfect little potato dumplings. Well, not so little.

Perfect little potato dumplings. Well, not so little.

About to take the plunge...

About to take the plunge...

Bring a big pot of salted water to boil then add 14-16 pierogis at a time.  (It will depend on the size of our pot.  You don't want to overcrowd.) Once they float to the top give them a 1-2 minutes more and pull them out. 

boiling.jpg

To serve, melt butter, then pour and slather over top of the pile of Pierogis.  You can also go the next step and fry them in butter.  This was the way we traditionally eat them the next day.  Either way, they are one of those comfort foods that qualify as a non guilty pleasure.  No guilt because you won't be making and eating these once a week or even once a month.  So go ahead, take time to make them, eat them and treasure them as the specialty food they are without any apology.

Boiled and smothered with melted butter.

Boiled and smothered with melted butter.

Alyssa and me.

Alyssa and me.

So here's to the 1/4 percent Polish I am, and to all the women in my life who passed down the tradition, and to the ones keeping the tradition alive and well.  And especially to Alyssa, who revived it, setting up the next generation of potato dumpling makers.  There is nothing I love more than tradition, and doing it together with the family I love.

And nothing more delicious that frying these up. Crispy outsides, and soft, yummy insides.

And nothing more delicious that frying these up. Crispy outsides, and soft, yummy insides.

Post Script:  My aunt Ann's daughter and my cousin, Mary Ann sent me a two good suggestions. 

  • Dough Kneading: She said for those who haven't mastered kneading dough or just want to make it a bit easier, you can use a bread machine or a mixer with a dough hook to knead the dough.

  • Freezing: For best results, her tip is to let them cool in iced water after they've been boiled, drain well and freeze to have whenever you need a fast potato fix.

Fried Polenta Topped with Mushrooms & Goat Cheese

final.polenta2.jpg

Oh, how I love mushrooms.  Oh, how I love polenta.  So, is it any wonder that, oh, how I love this appetizer.  I have made these tasty bites for many an occasion. Be it a formal dinner party, a buffet for a crowd or a simple first bite to a meal. They look impressive on a platter, but they are even more pleasing to the palate.  

You've heard me rave about polenta before.  It can dished out in an abundance of ways.  Creamy and soft, molded and fried.  For breakfast instead of grits or crumbled up on a salad instead of croutons.  As an app or a main meal. Some foods are just like that, they give and give like the famous tree in children's book, The Giving Tree.  "Here boy, take my stone ground corn and make magic with them."   I love that book, and I love polenta.  Did I say that already?  Well, I do.

Keeping with the abundant uses mode, you can top polenta with other veggies or even proteins like shrimp or pulled pork.  But today's recipe features earthy mushrooms. That's what I had available, so that's what I made.  I only had Creminis on hand but I have made this with a combo of mushrooms.  I implore you to explore and mix and match to suit your taste buds.

mushroom.setup.jpg

Ingredients

2 c polenta
2 T butter
6-7 c mushrooms, sliced
2-3 garlic cloves, sliced
1/3 c parsley, chopped
1 T rosemary, chopped
Magic 3 (Olive oil, salt, pepper)
Lemon zest
7 oz goat cheese
 

Instructions

Cook the polenta according to the package.  Whisking as you slowly pour it in to avoid any lumps.  

cook.polenta.jpg

Once it is cooked and reached a thick consistency, add salt, pepper to taste and stir in the butter until melted.

making.polenta.jpg

Then pour the polenta out onto a buttered baking sheet.  Using a spatula, spread the polenta evenly out.  I usually use a larger sheet pan so the entire polenta base is thinner.  But I was at my mom's house and her pan was smaller, so these were thicker.  In the end, I liked the size of these. You can choose the thickness according to whatever floats your boat.  

Since I was taking the photos, I enlisted my mom to help out with the action shots. It's fun cooking with her.

Since I was taking the photos, I enlisted my mom to help out with the action shots. It's fun cooking with her.

Spread it out to create an even layer.

Spread it out to create an even layer.

Once the polenta is evenly spread, cover it with plastic wrap and allow it to set in the refrigerator. Meanwhile, start cooking the mushrooms by adding 2 tablespoons of oil to the pan.  I like using a cast iron pan as it retains high heat and gets a good sear on the mushrooms.  The key to mushroom cooking is let them cook on one side without moving them around.  This allows them to get nicely browned.  Also, salt them when they have browned.  If you add salt too early to the cooking process it makes the mushrooms release water.

mushrooms.cook.jpg

I also cook mushrooms in batches in order to avoid crowding the pan.  Too many reduces the pan heat and they begin to steam instead of sear.  Once all the batches are done, remove the mushrooms and cook the garlic, rosemary and parsley in more oil.  Then add to the mushrooms.  I grated some lemon zest over the mushrooms which brightens the flavor.  (you can also zest more once you assemble the whole dish.) Set aside while you continue preparing the polenta.

garlic.parsley.jpg

Once the polenta is firm, cut into squares or use a cutter.  I was going to cut these into my usual small squares using a knife, but I found a round ravioli cutter in one of my mom's drawers and thought it would be fun to use especially because it had a scalloped edge. 

This time I got my sister, Alyssa, to help with the action shots. Of course, using a square cutter or a knife will eliminate waste, but I liked the rounds.

This time I got my sister, Alyssa, to help with the action shots. Of course, using a square cutter or a knife will eliminate waste, but I liked the rounds.

And don't worry, I didn't waste all the leftover cut outs. I fried them up and added them to my salad.

And don't worry, I didn't waste all the leftover cut outs. I fried them up and added them to my salad.

Using the same cast iron pan, add oil to coat the pan and fry the polenta rounds in batches until crispy and golden brown.  These are already cooked, so you just want to get them crispy.  Remember, varying textures make food more interesting.  Crunchy outside with soft inside.

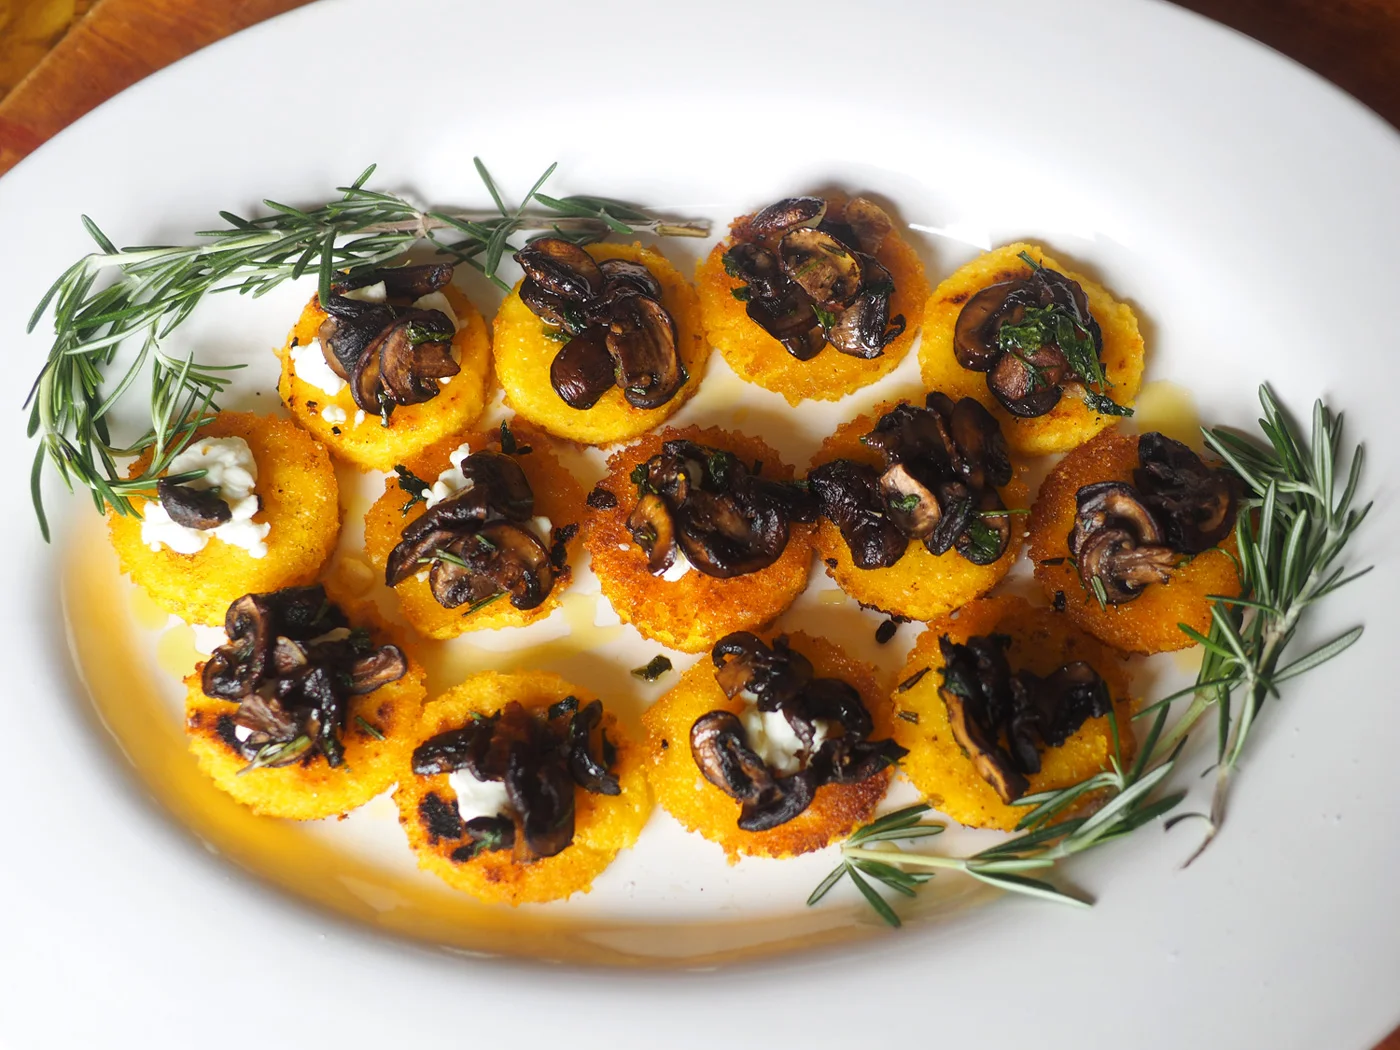
Once done, place them on a baking sheet, so you can keep them in a warm oven until all have been fried.  Then top them with dollops of goat cheese, and with a spoonful of mushrooms.

You can see that some of the rosemary from the cooking the mushrooms snuck onto the polenta. That is less of a problem and more of a blessing.

You can see that some of the rosemary from the cooking the mushrooms snuck onto the polenta. That is less of a problem and more of a blessing.

Little drops of goat cheese to add creaminess to the crunch,

Little drops of goat cheese to add creaminess to the crunch,

Make the platter look pretty by using the rosemary sprigs as adornment.

Make the platter look pretty by using the rosemary sprigs as adornment.

We had some roasted red peppers also as an appetizer.  It made a wonderful partner to this earthy, crispy bite.  

Side note:  Using a 2" ravioli cutter,  I got about 18-20 pieces.  You can get more if you cut the pieces smaller and in squares.   Also, this is an appetizer than can be prepped ahead of time.  You can make, and even fry the polenta ahead of time.  Then when you are ready to serve, pop them in the oven to warm them up and assembly.  Enjoy polenta, the giving tree of corn!

final.polenta.round.jpg
 
DP-stirredwlove-ID1.jpg

Pretty in Pink Salad

final.salad.jpg

Inspiration can leap out at you from anywhere.  Literally, anywhere.  And in any form.  Sometimes I spot something curious and it motivates me to write a children's stories.  Other times I see items and envision how I can transform them into something useful.  Then, there is of course, the spying of food that inspires me. And that's how it went down this past week while shopping in our local Italian specialty market, where I happened upon the most stunning lettuces.  I had never before seen pink lettuce. Or white lettuce with magenta flecks. 

Did you ever???

Did you ever???

Figs upon figs. There was not a one leftover.

Figs upon figs. There was not a one leftover.

I was intrigued. I was compelled. I just had to have them.  In my basket they went.  I figured I would make a big lunch salad for myself.  But as I waited, patiently, on the line of inefficiency, (remember, this is the same Italian market where we picked up the rack of pork the week before. Slow and slower is their mantra.) I spotted burrata. The lettuces seemed delicate and a good potential partner for burrata.  A few dishes down in the same case I eyed imported figs. My dad simply adores figs, so those were a must buy whether for the salad or just for him to eat.  But I pondered this combo more as I noticed a nearby plate of roasted beets.  And there is was, laid out before me, one piece of this salad puzzle fitting together with every step I took.  Inspiration leaped out in front of me with an exact plan for how I would showcase these lettuces.  Lettuces that seemed more like flowers than vegetables.  This would be a dainty palette blend of soft pinks and magentas.

The additional line up to accompany the lettuces.

The additional line up to accompany the lettuces.

Ingredients

Baby lettuces (if you can find these pink hued ones, great.  If not, go with softer ones like Butter lettuce)
3-4 beets, roasted
2 pints of fresh figs, halved
1 stalk of celery, sliced
1 Burrata cheese
The Big 3 (olive oil, salt, pepper)
Dressing
3 figs
2 t Champagne vinegar
3 T fresh lemon juice
1 t lemon zest
1 small garlic clove
1.5 t salt
1/8 t pepper
1/2 c olive oil 

 
They literally look like flowers. So stunning, I can't take my eyes off of them.

They literally look like flowers. So stunning, I can't take my eyes off of them.

instructions

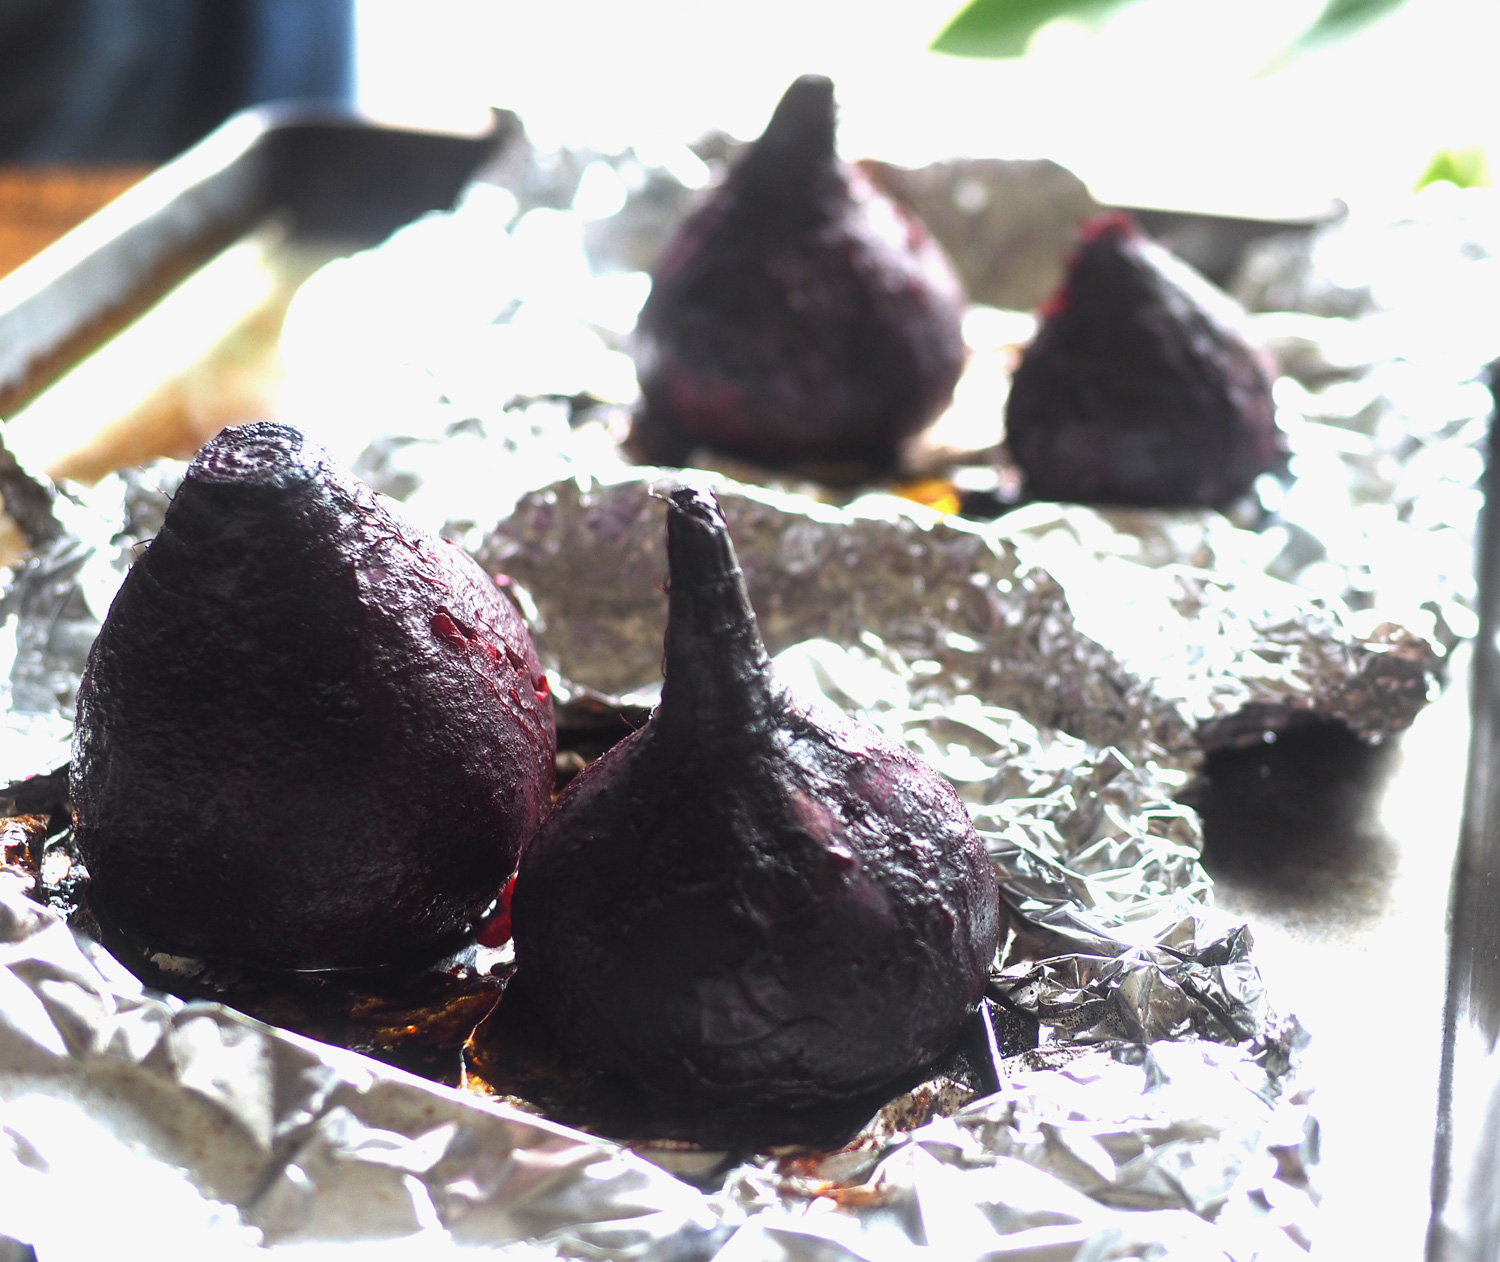
Start with the beets because they will take the longest.  You can even do this part the morning of or the day before.  Cut off the long leaves and scrub the beets.  Place them in tin foil on a baking sheet, then season with the Big 3. Close up the tin foil to create a package.  Roast at 375 for 1-1.5 hrs, depending on the size of the beets. They should be fork tender. 

Beets awaiting their steam bath by way of oven roasting.

Beets awaiting their steam bath by way of oven roasting.

While those are roasting, you can prepare your salad platter.  With such strong and gorgeous colors, it would be a shame to mix them all together.  These need to stand on the own to showcase their beauty. Color blocking was the way to go.  Arrange how you like but here is how I played it. I let the shape of the leaves help dictate the form, which naturally mimicked flowers.  

Look at those colors. Sweet and pink and oh so dainty.

Look at those colors. Sweet and pink and oh so dainty.

Since burrata is an extremely fresh cheese, it's best to place this in a separate small bowl, then nestle it in between the lettuces.  Once your guests cut into it, the creamy center will gush all over.  

The burrata looks like a big ball of mozzarella, however, it's creamy insides are the best surprise.

The burrata looks like a big ball of mozzarella, however, it's creamy insides are the best surprise.

Make the dressing in a mini blender by placing the figs, garlic, vinegar, lemon juice and zest and buzz together.  Add salt, pepper and oil for the final buzz.  Set aside until ready to dress the salad.

After the beets are done, let them cool so you can peel their outer skin off and slice them.  Arrange in a fan like fashion, and then tuck them into the salad, around the bowl of burrata.  Then place the figs around. 

Roasted to perfection, beets are hearty yet mild enough for this salad.

Roasted to perfection, beets are hearty yet mild enough for this salad.

Slice them and then fan them out to follow in that flower like theme.

Slice them and then fan them out to follow in that flower like theme.

Color blocking making it's statement.

Color blocking making it's statement.

Once you have the salad arranged as you like, pour the dressing over top.  Then drizzle with an aged balsamic. 

Photo Credit: lookasithappens.me

Photo Credit: lookasithappens.me

Of course, you could just cut up all the lettuce, beets and figs and toss them all together.  I think it would be lovely that way too.  I just felt like having each color burst off the plate, spring-ing to life with joy.

final.salad.cu.jpg

With all the different hues, it was pink and pretty...and good. Pretty good.