Dal - Lentil Stew

final.dal.love.jpg

No, not dull. Dal. And it’s anything but. If you like lentils, you will love Dal. Why?, because Dal is lentils- a lentil stew.

I’ve made lentils before. Both as a soup and as a side dish. Both using mirepoix for the base. But, I have never made Dal before. I looked up what spices are traditionally used in making Dal and decided I would use my own version. Ballsy, I know, but what the hell.

If you read last week’s blog post, and I hope you did, you know I had an inspiration spurt propelling me to create a complete Indian meal for JC, my sis Jill and myself. It started with the rice. Then moved onto what will go with the rice.

That’s where the Dal came in.

I used a couple of items that might not be traditional Indian ones but they blended beautifully in the dish.

I had roasted tomatoes. Boy, did I have roasted tomatoes since I just finished making 100lbs. of tomatoes. No, that wasn’t a typo; 100 glorious pounds. JC thought I was nuts. (I must admit that after the first 25lbs, I thought I was nuts too!) So, with plenty of roasted tomatoes on hand, I figured why not use them in my Dal. I also had celery and long hot peppers and wanted to use those up. I always taste as I go, so when I cut into the peppers, which I thought were supposed to hot, they didn’t seem to have the heat I expected. So, I added a jalapeño, too. Believe it or not, the spice level ended up being perfect for my palate. Not so spicy that I couldn’t taste anything else or not be able to detect that my tongue was still attached to my mouth. Yet spicy enough to wake up the senses.

dal.setup.jpg

Ingredients

3 c yellow lentils
1/2 c onion, small dice
2 T celery, small dice
1/3 c red & green long peppers hot, sliced
1/4 c jalapeño, minced
1.5 T crushed garlic
3 T oil
1 T turmeric
1 t cumin seeds
2.5 t curry powder
1 t salt
1 c roasted tomatoes + their juices
2.5 c water

The spice of life. Turmeric, salt, curry powder, cumin seeds.

The spice of life. Turmeric, salt, curry powder, cumin seeds.


Instructions

I chopped everything up into a small dice, slice and a fine mince. I wanted to create a sofrito, if you will. Then sautéd those in a pan with oil.

Fresh aromatics lightly sauteéd.

Fresh aromatics lightly sauteéd.

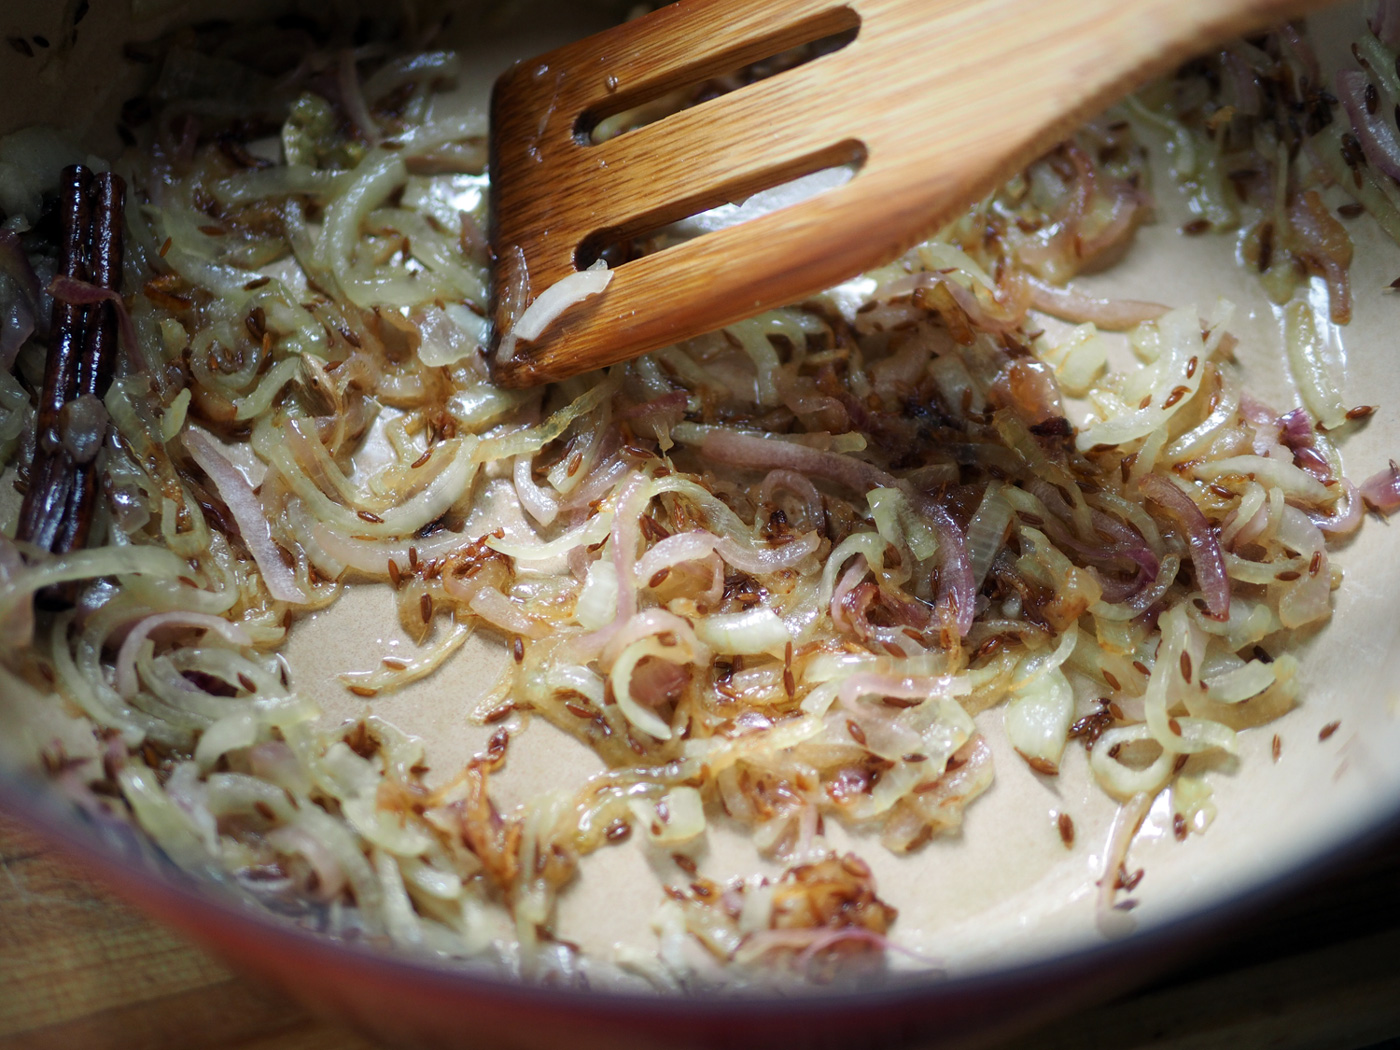
Once the fresh aromatics were softened, I added the dried spices and let them get all cozy together until they created a lusciously blended ‘sofrito’ base.

Dry spices in to truly spice things up.

Dry spices in to truly spice things up.

Cook down until it all becomes soften and luscious together.

Cook down until it all becomes soften and luscious together.

When you have homemade roasted tomatoes, then that is what you use. They were made with love, so…

(If you don’t have roasted, you can also use whole tomatoes in a can. And then add them in with love.) In went the tomatoes and lentils. Then I added water, covered the pan and let simmer until done.

Tomatoes and lentils finish off the main ingredients, as they wait for their water bath to gently cook them.

Tomatoes and lentils finish off the main ingredients, as they wait for their water bath to gently cook them.

And that is just how easy it was to make Dal. Again, boasting is not my style, yet two weeks in a row, it’s seems to becoming a trend. Here I am tooting my own horn again, because this Dal dish came out super tasty. I was worried about the spice level having added the jalapeño plus the long peppers, but it was quite on point. Again, I got the thumbs up for Jill and JC, both lovers of Indian food.

I served it with the Indian Spiced Rice, Spiced Cauliflower, Potato Pancakes and raita.

I served it with the Indian Spiced Rice, Spiced Cauliflower, Potato Pancakes and raita.

Now, I’m not saying that I’m some sort of expert, nor is this a traditional Indian Dal. But I am seriously happy at my first real foray into using Indian spices to create delicious dishes. I’m all for learning the traditional methods, staying true to a cultures cuisine. But I also believe that you have to just dive in and not be intimidated by its complexity. And that’s what I did here. Plus my style has always been, get a glimpse then make it my own.

Don’t forget to make the Indian Spiced Rice to go along with this. In the coming weeks, I will post the potato pancakes and cauliflower. Here’s to spicing up your life!

Indian Spiced Rice

It’s no secret I love Italian food, most notably – pasta. But that is just my go to comfort zone. I adore many other ethnic foods. I guess like most of us, when I don’t know what to cook, I lean into my sweet spot. So, in an attempt to not make pasta this particular day, I begged my tummy to give me a sign.

It answered back with a resounding gurgle for spice. And, as if the universe was conspiring with my stomach, forcing me to crawl out of my pasta coma, I just happened to tune into a cooking show where a rambunctious guy was making rice using star anise and a cinnamon stick. Now those are some fierce energy vibes working their magic in the universe; fast and furious. The craving turned into a rushing wave. I was now officially pining Indian flavors.

There was no time to waste, especially given that the day before was a total flop, food wise. The guilt from my lazy Monday of not making a stitch of grub, which left us grazing on some undressed arugula and a can of sardines, compelled me to make us a good meal. It was Tuesday, and no way was I going to let the week continue on this no cook trend. Plus my sister was coming. I seriously needed to get my butt into gear. Taking mental stock of what we had available, the first two items that popped up were string beans and potatoes. I could make Indian food with those.

Now for the spices. Sure, we keep a few interesting ones on hand, and some that land squarely in the Indian spice world. But we definitely didn’t have star anise or cinnamon sticks. Motivation was running sky high, so I hopped in the car and drove to our local market that specializes in Middle eastern spices and foods. I grabbed what looked interesting:

  • Cardamom seeds

  • Cinnamon sticks

  • Cumin Seeds

  • Fenugreek

  • Pepitas

  • Dried Currants

  • Curry powder

As soon as I got home I surveyed my new selections and very quickly realized I never got star anise. No biggie, this was going to be my version of Indian food anyway. Anyone who knows Indian food knows that the art of combining and blending spices is as masterful of a skill as being a Sushi Chef. So I wasn’t going to attempt a miracle on the Ganges. I just wanted some spice.

I knew I was going to make rice. That was a no brainer, since it is the basis for most Indian food. But I needed dishes to go with the rice. With my mind rattling off the different options, I came up with a long, and clearly over ambitious list in my zeal for making Indian food.

  1. Dal, a lentil stew

  2. Chana Masala - a chick pea stew

  3. Potato pancakes

  4. String Beans

  5. Cauliflower

In the end, I did accomplish 4 out the 6 machinations (including the rice) that whirled around in my head. The funny part is that one the food items that motivated me to make Indian food, the string beans, never got spiced up and served. I guess they couldn’t take the heat. So get out of the kitchen.

In order to keep this posting manageable, I will post the recipes for each of the other dishes separately in the next weeks. Otherwise, the photos alone will have you scrolling for days. For today, let’s focus on the rice, which quite frankly is where it all began.

Ingredients

3 c basmati rice
1 cinnamon stick
4 cardamom seeds
2 full T cumin seeds
1/2 c onion, sliced
1/2 c red onion, sliced
2 t salt
2 cloves
4.5 c water
4 T oil
scallions, thinly sliced, optional

I use olive oil for most everything. I don’t like using vegetable oil because it has soy in it. But you can use vegetable, canola or olive oil for this recipe.

Also, I was over ambitious and made 3 cups of rice. For two basic reasons. My husband loves rice like I love pasta. And my sister was coming for her every week trip, and she also loves Indian food. All the more reason to load up on this starchy grain. Make the amount you need and divide the amounts according. However, if it doesn’t divide evenly err on the side of using more.

Instructions

  1. First things first, soak the basmati in water for 15 minutes to take out some of the starch. This helps to make the rice fluffy and not sticky.

You only need enough water to cover the rice.

You only need enough water to cover the rice.

Then measure out all the spices. Since I was making this up as I went, I started out with less cumin seeds and then realized that I was making 3 cups of rice, so increased the amount to what I listed above.

Mise en place, get everything ready and in place. Salt, cardamon seeds, cinnamon sticks, cloves, cumin seeds.

Mise en place, get everything ready and in place. Salt, cardamon seeds, cinnamon sticks, cloves, cumin seeds.

2. Toast the dried spices in a large pot with oil.

3. Meanwhile, cut up red and yellow onion, then add them to the pot. Let them cook over medium low heat to allow the onions to cook down to right before the caramelized state.

Cinnamon stick, cumin seeds, cloves, cardamon seeds and salt.

Cinnamon stick, cumin seeds, cloves, cardamon seeds and salt.

Onions add a sweet flavor.

Onions add a sweet flavor.

In go the onions to cozy up with the spices.

In go the onions to cozy up with the spices.

Sauté the onions until just lightly browned.

Sauté the onions until just lightly browned.

4. Drain the rice, add it the onion/spice mixture and let the rice get coated with the all the oil, onions and spices. Just as you would making a risotto, or paella. (I like using this method of cooking rice whenever I am adding other ingredients to the cooking stage.)

sauted.rice.jpg

5. Add the water, bring to a boil, then cover and lower the heat. (I use a 1 to 1.5 ratio of rice to water.) Cook for 10-12 minutes. The rice should be light and fluffy and no water left.

You can add sliced scallions, or toasted chopped nuts. You could even roast up more of the cumin seeds and add it to the top. Let your mind and tastebuds be playful.

rice.final.jpg

The aromatics of this rice will make you want to spoon it right from the pot into your mouth, skipping the bowl. Which is exactly what JC did. He loves him some rice, and Indian rice at that.

I must admit that I wasn’t sure about how much of the spices to use, but not to be boastful, I was really proud of myself. I feel like I nailed the right amount of spice combo to create a flavorful rice to use as the base for my Dal.

The dinner plate we enjoyed and the lunch sample Lisa did, too.

The dinner plate we enjoyed and the lunch sample Lisa did, too.

Now, I know that anyone who is gifted at making Indian food will have plenty to say about my version. True chefs/cooks of Indian food have a magical hand at spice blending that creates a real depth and flavor adventure. My in-house taste testers and Indian food fans loved it. Getting a pretty dang good, two thumbs up from both JuanCarlos and Jill. Jill thought so much of it that she brought some into work to have one of her co-workers who is from India try it. I must admit I was nervous at the idea. Alas, he wasn’t in the office, so her co-worker, Lisa, got to enjoy a complete lunch. And good for her, because like me she has dietary restrictions. This was gluten free, dairy free and perfect for her.

Once I decided not to be intimidated about staying true to traditional Indian spices laws, I was free to create a dish that was good enough to eat. Try your hand at mixing different spices for your rice. The combinations are endless. If not, try this one. I think you’ll like it. Namaste.

Chicken Salad with Fruits & Nuts

chicken.salad.jpg

Have you ever had a chicken salad that just felt too heavy.  So much mayo that it almost leaves a slick cream streak down your throat?  Creamy is nice but heavy is not.   Especially during the summer months, salad featuring proteins should lift you up, not weigh you down. 

My recent cooking adventures afforded me the opportunity to cater for my Mom's 'Ladies Lunch'. I had proposed a couple of different menu options but they didn't want me to go too crazy, fancy.  Understandably so, they needed food that would have a broad appeal for everyone's palate, which makes total sense given a group of 30. Chicken Salad was suggested.

I must admit that making chicken salad didn't thrill me.  It was my job to give the 'clients' what they wanted but also introduce them to chicken salad with pizzaz. I like to create flavors that pop, and really wanted to make something different for these special ladies.  Instead of creating a new dish, the creating came in the form of how to take bland, regular, mayo slathered chicken salad and make it lighter and more exciting.  Once I realized that they were open to a more zippidity-do chicken salad, I starting thinking: summer, lighter, texture and crunch. That's when I got more excited.  Texture would come by way of adding crunchy, crisp fruits and toasted nuts. And I dare say that the fruits also help to lighten the load. Check off the texture category requirement.  Now how to lighten up the dressing that is typically globs of mayo?  Yogurt is light. It's tangy. It's zingy and is still creamy.  Gosh, if only I could be more like yogurt...
So, that was it.  I would cut the mayo in half using Greek yogurt and add a couple of other zesty ingredients to lighten it up.     

I got the thumbs up from the team leaders, my Mom and Elena. Onto the plan. I went back and forth about whether to use dark and white meat, whether to roast or poach.  In the end, I choose to use organic chicken breasts and to poach them using aromatics to subtly impart flavor.

Ingredients 

(This batch was made for 30 people. And it made about 10 c.  Scale down for your needs.)
For the Poaching
9.5 lbs Chicken Breasts *                                       
4 bay leaves
4-6 lemon slices
2 t peppercorns
1 carrot, chopped in chunks
1 celery stalk, cut in pieces
parsley sprigs

For the Salad
2 c red seedless grapes, thick slices
2-3 red apple, peeled & cubed
5-6 scallions, thinly sliced
1 c walnuts, roasted & rough chopped
* You can also use leftover chicken and add the dressing.  

Dressing
1.5 c Mayonnaise
1.5 Greek Yogurt
2-3 T Lemon zest
1/3 c lemon juice
2 T mustard
salt, pepper
 

Instructions

1. Clean and rinse the chicken well.  In a large sauté pan, add the chicken in one layer in the pan.  Add the aromatics and enough water to almost cover.  Bring to a boil, then cover and let simmer for 8-10 minutes depending on the thickness of the chicken.  Use a thermometer to ensure that the interior is 165 degrees.

2. While the chicken is cooking, make the dressing by whisking together all the ingredients.

Creamy, tangy and light.

Creamy, tangy and light.

3. Once the chicken is done, remove from the pot and let it cool.  Meanwhile, roast the walnuts for 5-7 minutes and rough chop them.  Cut the grapes, apples, and scallions. (Squeeze some lemon juice over the apples or submerge in lemon water to keep them from turning brown.)

Chicken
Red grapes
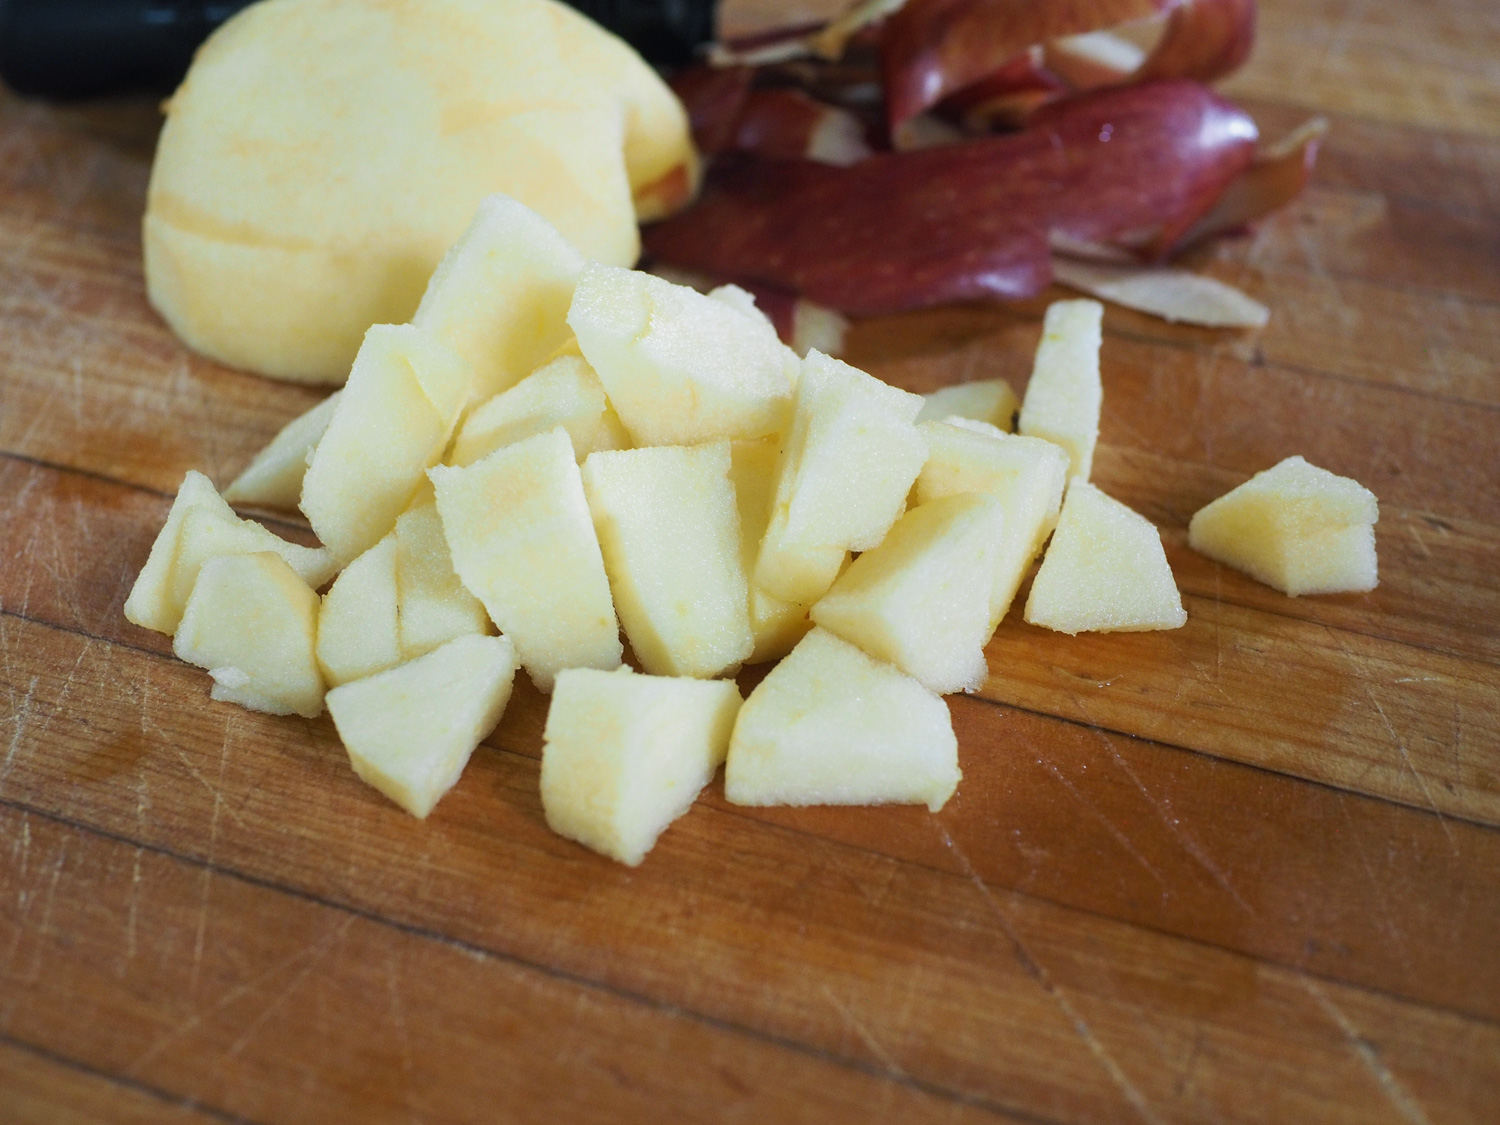
Apples

4. Either cut the chicken into chunks or shred.  Your choice. Mix all the ingredients together with the dressing.  Some people like their salad moist, others dry. Dress as desired.

Chicken Salad lighter

You can serve this on rolls, or French baguette.  I decided for summertime, and for a healthier option, to serve them with small romaine lettuce leaves to act as boats.   All the ladies enjoyed this light and tangy chicken salad. 

A huge bowl full of light and crunchy, savory and zesty chicken salad.

A huge bowl full of light and crunchy, savory and zesty chicken salad.

The ladies taking a little bit of all the offerings.

The ladies taking a little bit of all the offerings.

Since I made a ton of chicken salad and had so many other offerings, I had some leftovers.  I brought home some chicken salad, and the Israeli Couscous  and Asian Slaw with Tahini/Peanut Dressing and made a bountiful  lunch plate for JC.  At first he said, "That's way too much food."  Not too much later, I found the plate, empty, not even a grain of couscous left.  Apparently, it wasn't too much. He loved it enough to have the rest the next day.  

And since I had some of the chicken salad dressing leftover and I love to share, I gave some to my neighbors who are a foodies. They just happen to have some roasted chicken.  What serendipity.  They mixed up my dressing with their chicken and loved how the lemon zest and juice really brightened it all up.  Why did the neighbor cross the road?  Ask the chicken.

My plate full of love that I made for JC's lunch. Boston lettuce pockets filled with zingy chicken salad, couscous and peanut slaw.

My plate full of love that I made for JC's lunch. Boston lettuce pockets filled with zingy chicken salad, couscous and peanut slaw.

Why did the chicken cross the road?  To mingle with a few fruits and nuts and slather herself in a light yogurt lemon dressing, of course.


Lime Zest Cookies with Raspberry Filling

lime.zest.final3.jpg

For years I have been making these Lime Zest cookies. It actually all started years ago when my dear friend Donna asked me to make cookies for her wedding as part of the guest gift bag. What an honor. When you think of weddings, you think of white. Well, at least I do. So I naturally wanted the cookies to have a white motif, and from all the ones that I had chosen I needed one more cookie that would deliver on that theme. I found this Lime Meltaway recipe from Martha Stewart which dusts the cookies with confectioner's sugar, thus making them white. 

Although the original recipe is not mine, I made it my own but adding a twist. The first few times I baked them I followed the recipe as is, including for the wedding. But when I needed to make a cookie for an event, this single wafer didn't seem like it would be enough. What is better than one cookie?  As my darling nephew John stated as a small tot when given one cookie, and asked 'What do you say?' (his mom hoping for Thank you) he shouted out: Two Tookies!  Exactly; two are much better than one. And even better when sandwiched together with the perfect tart compliment to lime of raspberry jam. From that moment on I have been making these cookies with my jammy, tart and sweet stamp. From that moment on, these cookies became a hit.   

Ingredients

1.5 sticks butter, room temp
1 c confectioner’s sugar (1/3 for dough & 2/3 for dusting)
Zest of 2 limes
2 T lime juice, freshly squeezed
1 T vanilla
1 3/4 c + 2 T flour
2 T cornstarch
1/4 t salt
 1 (18oz.) jar of red raspberry preserves  (seeds removed)

Instructions

1.    Using a mixer with a whisk attachment, mix butter and 1/3 c sugar until pale and fluffy.
2.   Add lime zest, juice and vanilla until combined.
3.   Whisk together flour, cornstarch, salt in a bowl and add to the butter mixture on low speed until all combined.
4.   Divide the dough into 2-3 smaller mounds and roll into 1 1/4" thick logs. Wrap in tin foil and freezer until hardened. Approx. 1/2 hour.
5.   Using a sieve, push the jam through to remove all the seeds. Then place jam in a pastry bag or plastic bag with the tip cut off and set aside until ready to fill the cookies. (Cut tip off right before filling.)
6.   Remove the logs from the freezer and cut 1/8" thick rounds placing them on a parchment lined baking sheet.
7.    In a 350 degree oven, bake for 9-12 minutes until they are barely golden.  You may need to rotate the baking sheet half way through. These are thin, delicate cookies and you want them to be tender not overdone.
8.   Remove from baking sheet and let cool on a rack.  I cut up paper bags and spread them on my dining room table. The clean up is easier after the sugar dusting. 
9.   I line the cookies in rows of pairs turning one cookie over to reveal the baked side. Then using the piping bag, dollop about 1/2 T of jam onto the turned over cookie.  Repeat on half the cookies, then top them with their pairs. I usually push all the cookies close together at this point to ready them for the sugar dusting.
10.  Using a same strainer, sprinkle the remaining 2/3 c of confectioner's sugar over all the cookies. Let the sugar set before storing them away. 

You won't need this many limes unless you are baking for an army. I make 6x the recipe during the holidays to give to my family and friends. Photo credit: asithappens.format.com

You won't need this many limes unless you are baking for an army. I make 6x the recipe during the holidays to give to my family and friends. Photo credit: asithappens.format.com

Creaming the butter with the confectioner's sugar makes it light and fluffy. Remember, this photo shows me making many batches.

Creaming the butter with the confectioner's sugar makes it light and fluffy. Remember, this photo shows me making many batches.

When you add the lime juice and zest the butter seems to break, but do not worry. It all comes together with the dry ingredients. Photo credit: asithappens.format.com

When you add the lime juice and zest the butter seems to break, but do not worry. It all comes together with the dry ingredients. Photo credit: asithappens.format.com

A moment of zen. Photo credit: asithappens.format.com

A moment of zen. Photo credit: asithappens.format.com

There are several key pointers that I want to share about making these cookies.

  • Roll the dough into logs ensuring that there are no air pockets in the middle. (The first time I made and cut these I noticed that the lime juice creates air pockets and each cookie had a tiny hole in the middle. To avoid that, just roll and push the dough together and roll again into the log.

  • Roll the logs evenly and equal size.

  • Freeze the dough log so you get a clean cut without squashing the log. Use a sharp knife.

  • Remove the cookies carefully from the baking sheet. They are very delicate when they first come out.

  • Try to match up your cookies so each sandwich consists of two equally sizes cookies. (I know this may sound like the words of a crazy, controlling person but if you don't want jam oozing out because one cookie is bigger than the other, then hear me out. I have a method that ensures the cookies are good matches. When I place them on the sheet to be baked I place them in exact order that I cut them so each slice is next to the one before it. Then when I remove them, I do the same. This way similarly sized cookies will be together making it easier to match up when you sandwich. I know this sounds nuts and might not be an issue for you, but when you are selling your cookies or presenting them at an event perfection is expected. Heck, when you are serving them to guests they should look pretty, too.)

Freezing the dough makes cutting so much easier. I eye ball the width trying to ensure each cookie is the same size, about 1/8".  Photo credit: asithappens.format.com

Freezing the dough makes cutting so much easier. I eye ball the width trying to ensure each cookie is the same size, about 1/8".
Photo credit: asithappens.format.com

Use parchment paper and give them a little space between. They don't grow that much. I usually get 5 across on a half sheet pan.  Photo credit: asithappens.format.com

Use parchment paper and give them a little space between. They don't grow that much. I usually get 5 across on a half sheet pan.
Photo credit: asithappens.format.com

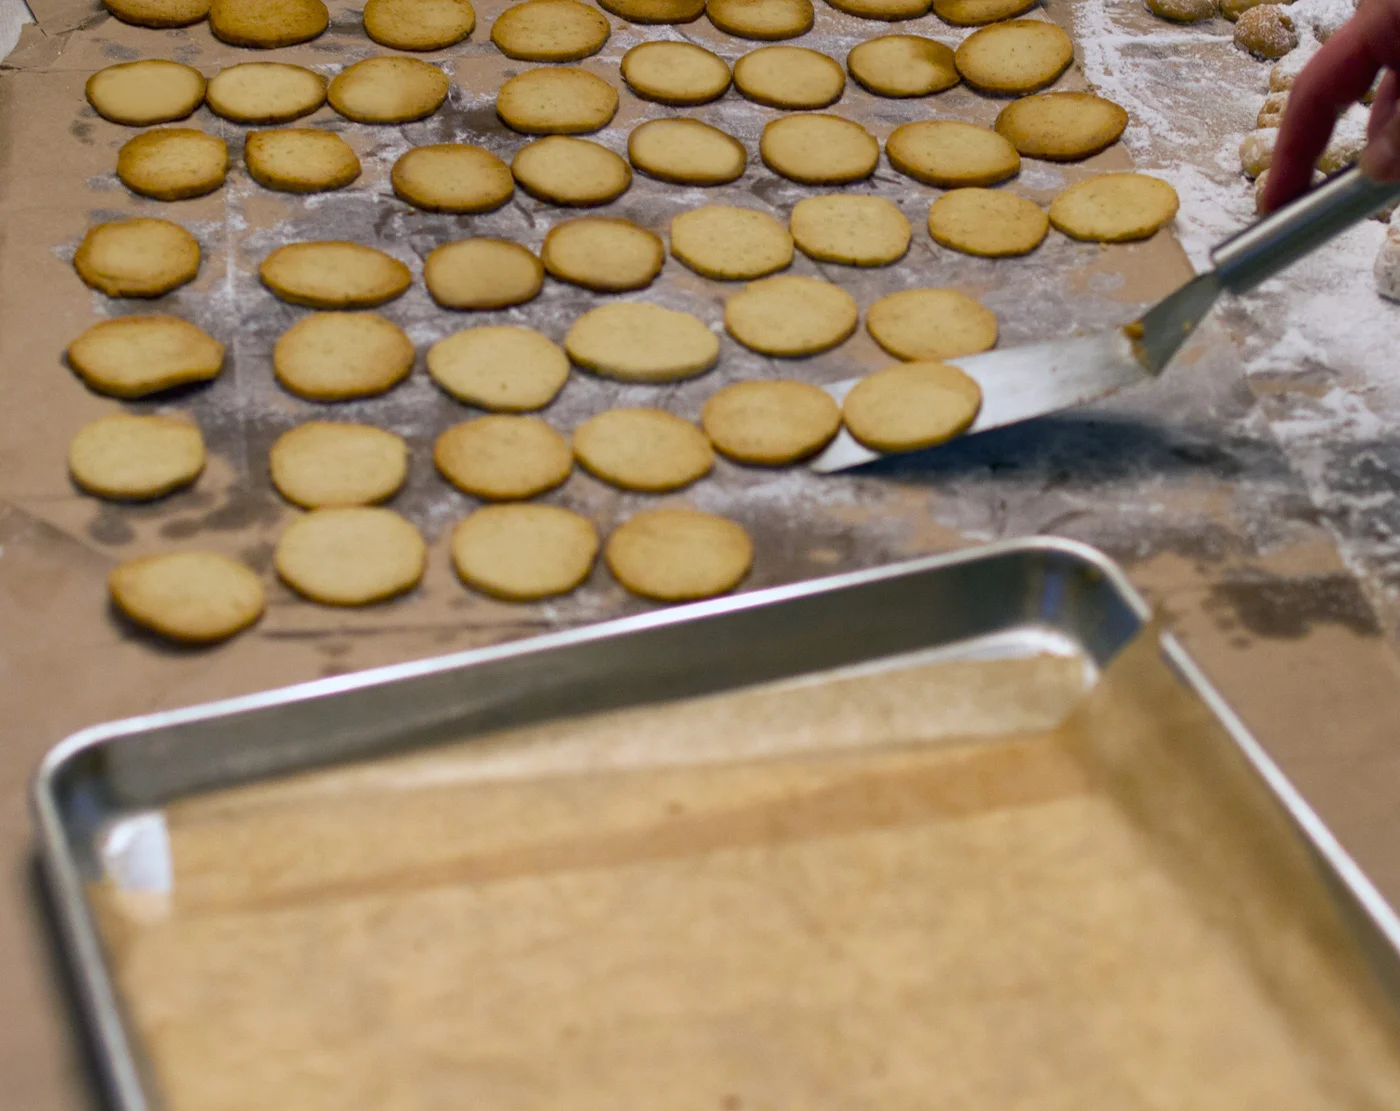
These are delicate cookies when they come out of the oven. When removing them from the pan, be gentle when placing them to cool. Photo credit: asithappens.format.com

These are delicate cookies when they come out of the oven. When removing them from the pan, be gentle when placing them to cool. Photo credit: asithappens.format.com

I always try to find the most efficient way to accomplish a task. Putting the jam in a piping bag or a plastic bag makes it easier to dollop onto each cookie.  Photo credit: asithappens.format.com

I always try to find the most efficient way to accomplish a task. Putting the jam in a piping bag or a plastic bag makes it easier to dollop onto each cookie.
Photo credit: asithappens.format.com

After they are lined up, turn one row over so you are filling the baked side with jam. Then the outside of the cookie looks nice when sandwiched together.  Photo credit: asithappens.format.com

After they are lined up, turn one row over so you are filling the baked side with jam. Then the outside of the cookie looks nice when sandwiched together.
Photo credit: asithappens.format.com

sandwich.cookies2.jpg
Jam it up and sandwich it up. Photo credit: asithappens.format.com

Jam it up and sandwich it up. Photo credit: asithappens.format.com

Like snow, let the sweetness fall and cover with a good dusting. Photo credit: asithappens.format.com

Like snow, let the sweetness fall and cover with a good dusting. Photo credit: asithappens.format.com

Photo credit: asithappens.format.com
And just like that they begin to disappear. Photo credit: asithappens.format.com

And just like that they begin to disappear. Photo credit: asithappens.format.com

I always get a thrill out of watching the faces of people when they try these cookies for the first time.  They can't quite make out that the zingy flavor is lime, because who would expect that in a cookie.  Then they smile with tartness of the raspberry jam finished with the sweetness from the powdered sugar dusting.  It's a perfect combo.

As you can see these cookies have that snowflake feeling. White and delicate, they were perfect for Donna and Jeff's wedding. Thank you Donna for asking me to be a part of your joyous celebration, and thus finding another cookie tradition that everyone loves.

Me, Donna & JC at her wedding. Doesn't she look happy & beautiful! And not because of the cookies.

Me, Donna & JC at her wedding. Doesn't she look happy & beautiful! And not because of the cookies.


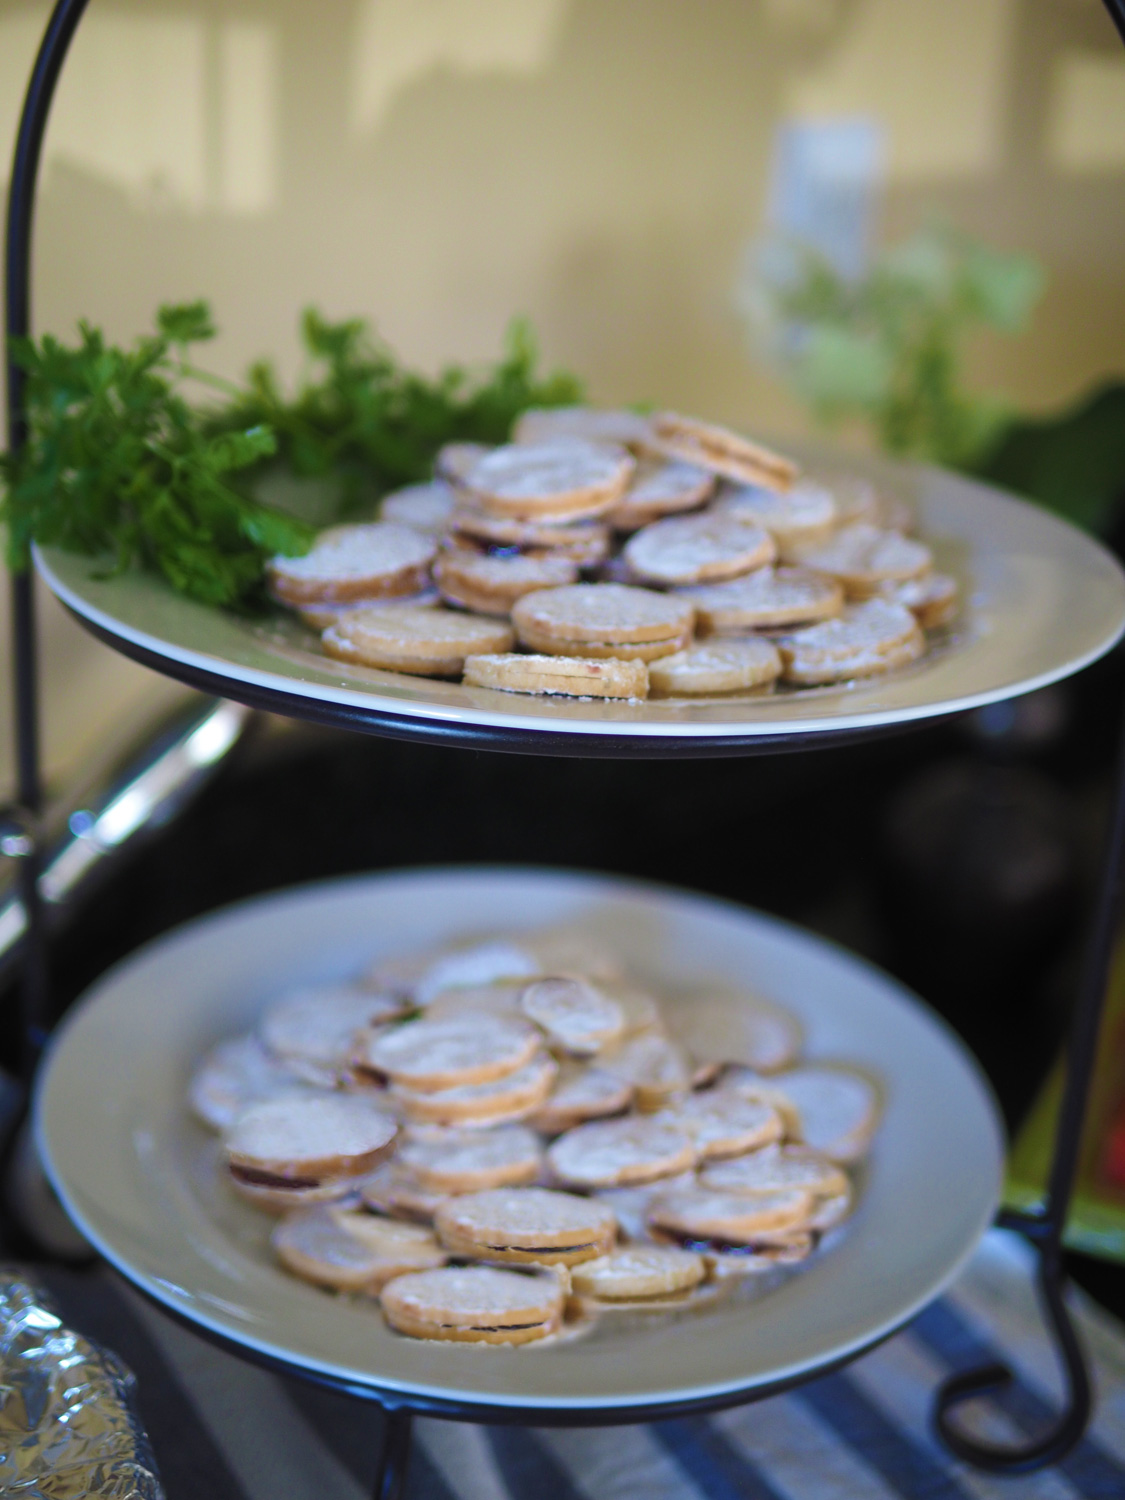
I usually make them as part of my Christmas cookie offering but recently these have been requested for two different catering events.  They were, and are universally loved.  I hope you give them a try whether it be for your own sweet tooth need with tea, or to share with your guests.

My Christmas cookie box.

My Christmas cookie box.

As part of a catering event's mid afternoon dessert offering in the Hamptons.

As part of a catering event's mid afternoon dessert offering in the Hamptons.

At a luncheon for my Mother's Ladies Group

At a luncheon for my Mother's Ladies Group


Smoked Trout Cucumber Bites

final.trout.platter.jpg

Coming up with easy to make, easy to eat appetizers is a fun game I like to play.  Sure, I almost always put out a cheese/charcuterie board because it's chock full of crowd pleasing eats: cheese, dry-cured meats, olives, nuts, fruits & crudité bits.  But I truly enjoy serving a 'pop in your mouth' nibble.  These Smoked Trout Cucumber Bites answer the call. 

I have used smoked trout before in several different ways.  In the fall and winter months when the cucumber is swapped out with a small, warm potato rounds, it makes a perfect combo of a warm and cold bite. Sometimes I use small new potatoes, as shown here.  Sometimes, fingerling potatoes.  But for the warmer weather months, I choose a boat that keeps it cool, like a cucumber, or endive.

trout.potato.jpg

Ingredients

5-6 oz. Smoked Trout, flaked approx. 1.25 c
(pre-packaged like Ducktrap or from a specialty deli)
1 English cucumber, thick slices
1/3 c + 2T sour cream
1/3 c scallions, thinly sliced
chives, finely chopped


trout.pkg.jpg

Instructions

1. Cut the cucumber into thick slices about 3/8" thick and arrange on a platter.

cucumber.rounds.jpg

2. Remove the skin from the smoked trout and break it up with your clean fingers, or flake it with a fork.  I use my fingers because I am able to feel and remove any fine bones.

3. Add the scallions and/or chives, plus enough sour cream to hold the smoked trout together. (The store didn't have any chives that looked good, so I only used scallions on this day.  I do love chives for this dish, though.)

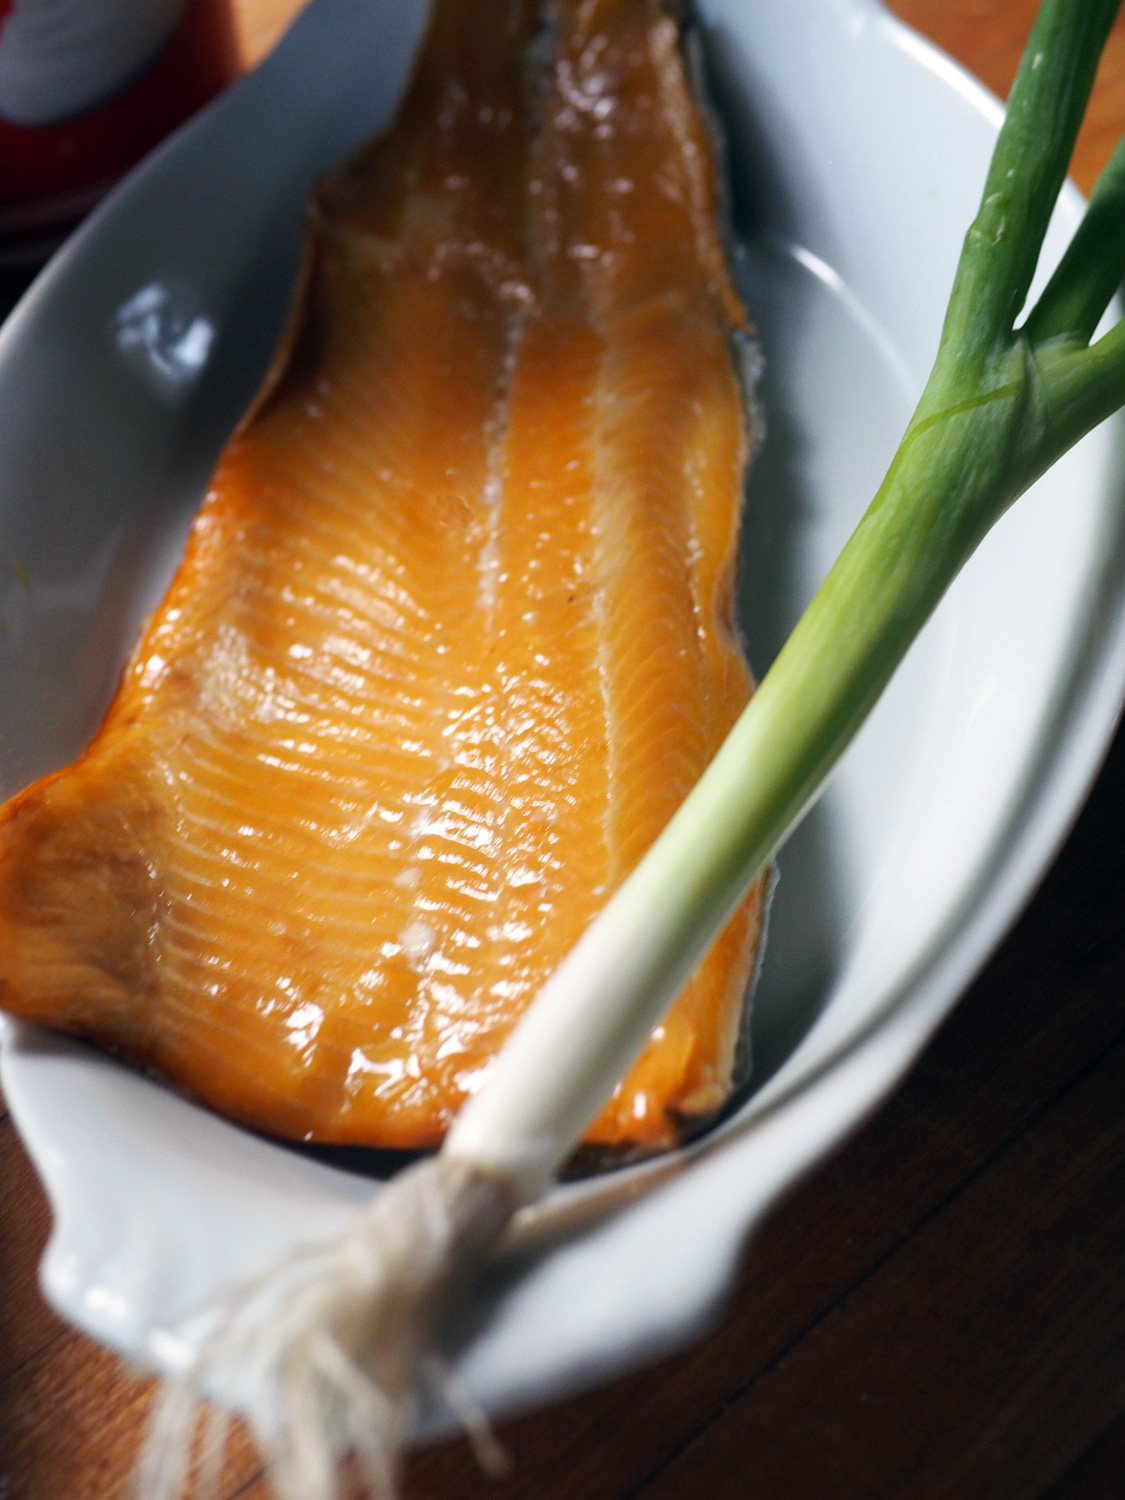
Smoked Trout skin still on, waiting to be flaked.

Smoked Trout skin still on, waiting to be flaked.

Smoked Trout flaked.

Smoked Trout flaked.

Awaiting the savory combo of scallions and sour cream.

Awaiting the savory combo of scallions and sour cream.

4. Again, using your clean hands or a small ice cream scoop, create little mounds on top of each cucumber round. The ice cream scoop is not only faster, but also makes keeps it all uniform and looking pretty.  We eat with our eyes, folks.

trout.scoop.jpg
trout.scoops.jpg

5. Place about 2 T of sour cream into a small plastic bag, taking all the air out and cutting a small hole on one of the corners. Squeeze a little dollop of sour cream on top of each mound.  Sprinkle with more scallions and chives.

sour.cream.bag.jpg
sour.cream.dollop.jpg
rounds.scallions.jpg

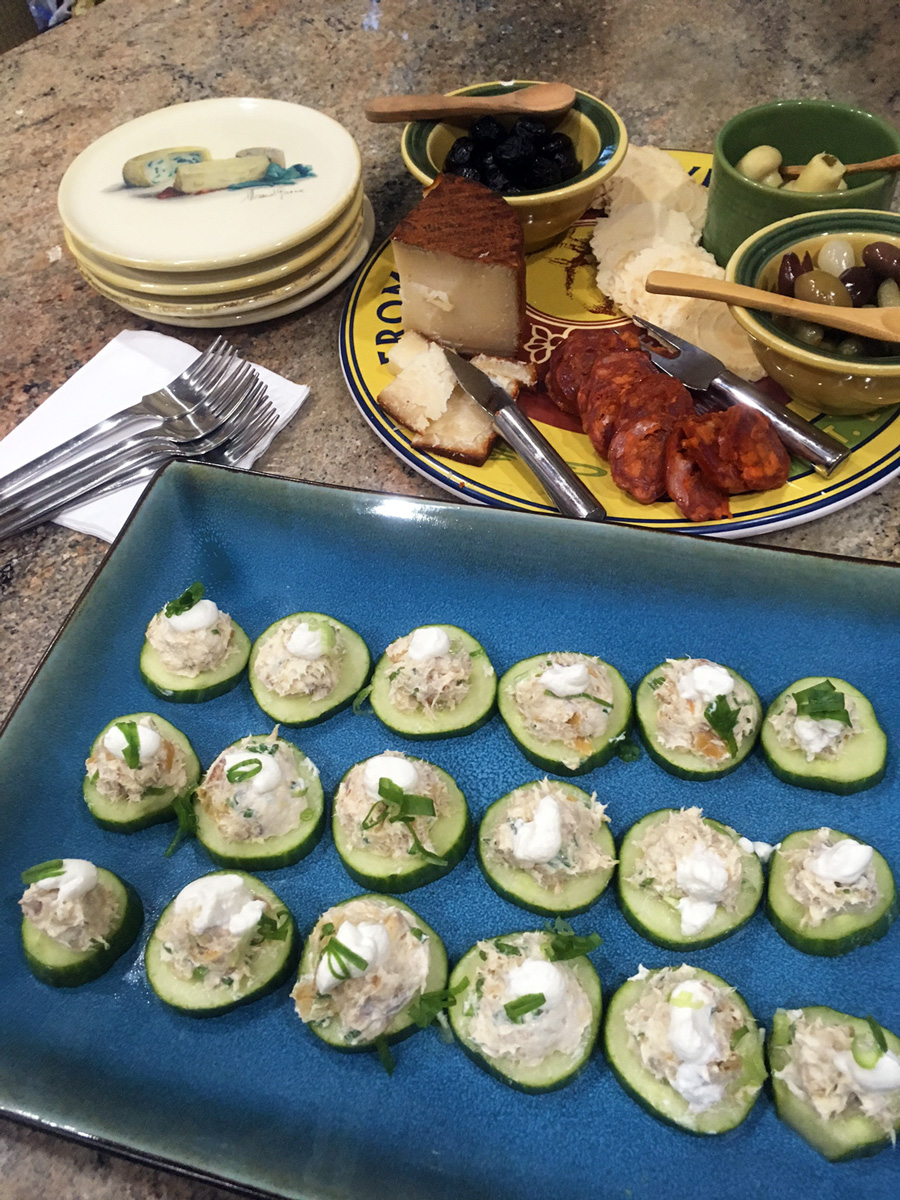
I made these two weeks ago for an outdoor party placing them on a tiered plate rack, which came back to the kitchen with two empty plates. And again two nights ago for a late summer dinner party.  They were loved both times. Cool and refreshing; a one or two bite nibble that everyone will love. 

final.cucumber.rounds.jpg
final.cucumber.tierstand.jpg

This could not be simpler to assemble. You've made tuna salad before, right? Well, this is the same concept, only presented in a tantalizing, easy to enjoy way.  Best part is that you can scoop this mixture on top of other 'pop in your mouth' vehicles.  Need some ideas?

  • Fingerling or New Potato rounds

  • Potato Chip, or Tortilla Chip Cups

  • Puff Pastry round

  • Radish Slice

  • Endive or Mini Romaine Leaves

  • Celery Stalk pieces

You get the idea.  I served these as one of the 3 appetizers for a small dinner two nights ago.
Here was the scorecard:

 
  • Consumers: 4

  • Smoked Trout rounds: 18

  • Leftovers: 0

We smoked these babies.

One of the other apps was a cheese/charcuterie plate.

One of the other apps was a cheese/charcuterie plate.

final.trout.overhead.jpg