Fall Themed Centerpiece

fall.florals.final.jpg

Yup, it’s that time of year. Nature is doing her thing. Leaves are turning those awesome vibrant hues. Acorns and pinecones are dropping like bombs. Squirrels are busy squirreling away treats. And us mere mortals are coming to terms with the summer really being over. But there’s always a silver lining.

Autumn brings a crisp freshness to our world. A cleansing of nature as leaves fall and regenerate new buds. And the opportunity to wear those chunky sweaters breathes new life into our fashion repertoire. The change of season also ushers in the occasion to freshen up your decor. In my house, beauty is brought inside.
Cue the Fall Themed Centerpiece.

Sure, you can create a floral arrangement, upright and traditional. Or, you can climb outside the box (or that large vase) and go horizontal. I don’t mean wrestling around with your significant other in the fallen leaves. Although, that doesn’t sound like a bad idea at all. I mean, take your florals and fashion them into a landscape that meanders through a forest-like scene. One that creates several visual points of interest.

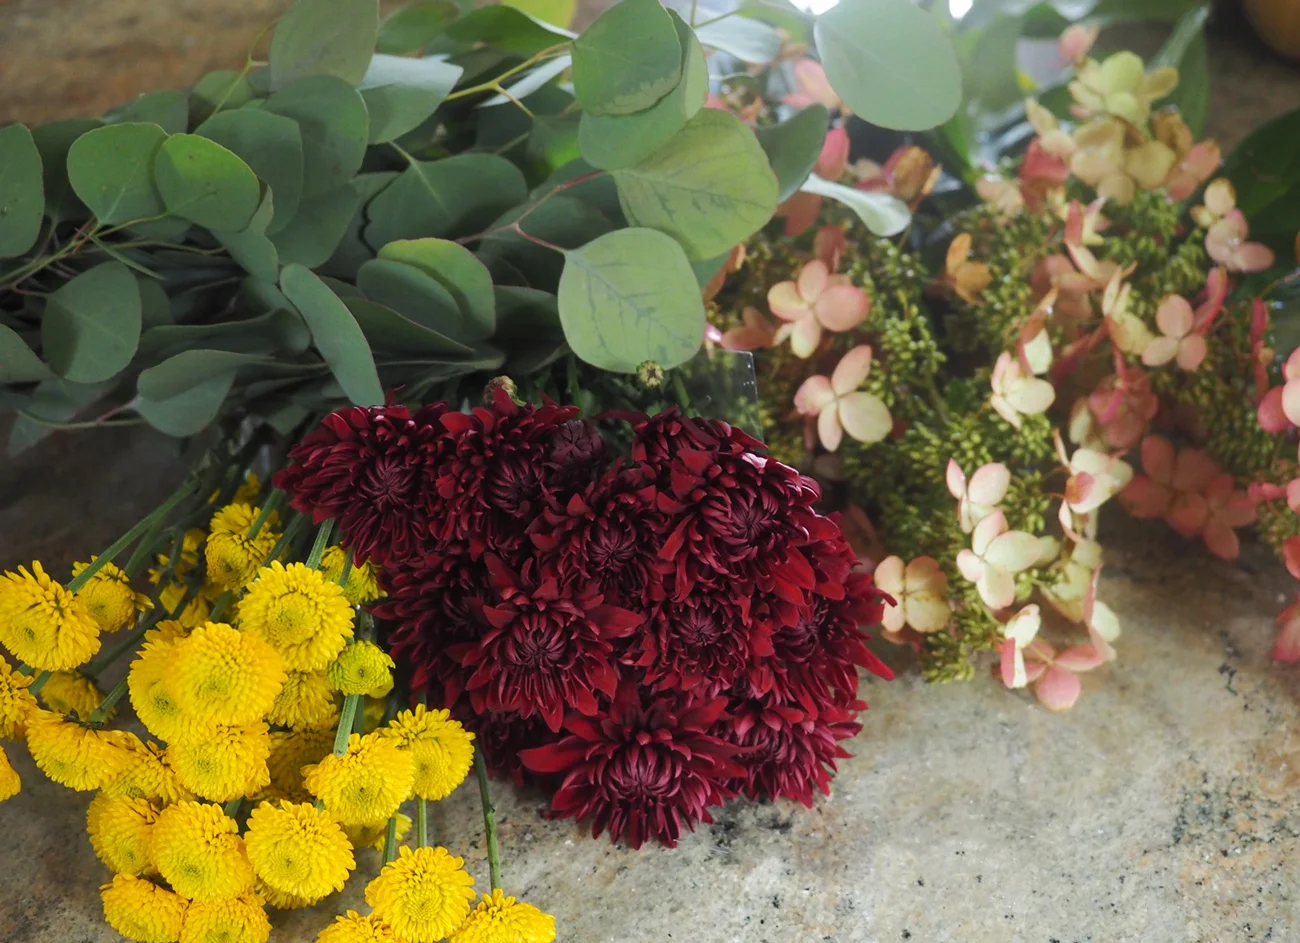
The best part of this type of centerpiece is that you can design it with whatever you have, and do it inexpensively. I grabbed yellow and crimson mums (from my favorite floral spot Dahlia NYC) to mimic the colors of the leaves, plus some eucalyptus leaves. All the other items I grabbed from our garden (rosed hued hydrangea, pine cones) or around the house. The entire arrangement cost me $20.

Burst of yellow pom pom mums, crimson mums, eucalyptus leaves and hydrangea are the stars.

Burst of yellow pom pom mums, crimson mums, eucalyptus leaves and hydrangea are the stars.

Long wooden trays or boards are perfect. But you can use a ceramic platter or whatever else suits your fancy.

Long wooden trays or boards are perfect. But you can use a ceramic platter or whatever else suits your fancy.

Going horizontal meant finding a main ‘vessel’ that would serve as the base since I was ditching the usual tall, large vase. I searched for something a tad out of the ordinary. A few choices popped up, including a long ceramic platter, but I settled on a wooden tray for a few reasons. One, it was the largest and I felt I needed the space. Two, it’s easy to carry since it is a tray. Three, I like the feeling of the earthiness of the wood. But use whatever you have. Oval, or round, rectangle or square. It doesn’t make a difference. The only important aspect of this kind of arrangement is to go low and long. Landscape, not portrait. I then gathered up some small vases, cups, shallow bowls, pumpkins and water phials (tubes with rubber caps to hold water for single stems).

The helpers to this arrangement. It’s key to gather up your tools.

The helpers to this arrangement. It’s key to gather up your tools.

Next, I lined the tray with parchment paper to protect the wood. And moved onto laying the groundwork… literally. Instead of using the eucalyptus leaves in a large spray like I usually love doing (Eucalyptus Burst), I spread them down to create a bed, as if it were a forest and the leaves fell to the ground.

I love this wooden tray, so it was important to me that I make sure it was protected.

I love this wooden tray, so it was important to me that I make sure it was protected.

Since these stems will be lying down, do not fill the water phials to the top, as then the water will slip out.

Since these stems will be lying down, do not fill the water phials to the top, as then the water will slip out.

Fill the tray, leaving spaces, or making spaces for the vases.

Fill the tray, leaving spaces, or making spaces for the vases.

From there, I nestled vessels of differing heights to hold the flowers. All the while, visualizing how to spread out the color.

I loved how the color of this sake cup blended right in.

I loved how the color of this sake cup blended right in.

Slightly taller, heart-shaped glass vase seemed appropriate and perfect to give some height to this horizontal piece.

Slightly taller, heart-shaped glass vase seemed appropriate and perfect to give some height to this horizontal piece.

Then I added the pumpkins and squash to the scene.

Yellowy, green pumpkin added a nice pop of color amongst the green leaves.

Yellowy, green pumpkin added a nice pop of color amongst the green leaves.

Filling the space with a butternut squash adds to the bounty.

Filling the space with a butternut squash adds to the bounty.

It was then time to fill the vases with flowers. I started by cutting the stems of the crimson mums short so they could fill up the shallow bowl.

mums.shallow.bowl.jpg

I continued to fill in and see what looked good and worked in each vase, thinking about spreading the color around the arrangement, as well as adding contrasting colors next to each other.

See how both the yellow pumpkin and the crimson mums are accentuated by being placed next to one another?

See how both the yellow pumpkin and the crimson mums are accentuated by being placed next to one another?

shallow.bowl.jpg

I noticed that there was a corner that seemed empty, so I added another shallow bowl for an additional burst of color. You see, you don’t have to have it all planned out exactly. You can add, subtract, modify as you go.

The idea is to create something that feels right to you. Move things around until it pleases your eye and your heart.

right.side.view.jpg

I stepped back to inspect landscape and its little scenes within itself. I decided to tuck in the last two hydrangea flowers and have them cozy themselves into the eucalyptus base, as if they might had fallen down. Plus, it created more depth and visual interest.

Use the water phial to hydrate the hydrangea. Then tuck it in wherever feels right.

Use the water phial to hydrate the hydrangea. Then tuck it in wherever feels right.

The final touch was to slip a few pinecones right up front.

I think it turned out pretty cool. Loads of color. Little pockets of visual charm in every corner. Highs and lows, Pops of bright yellow contrasted by deep crimson hues. Abundance and bounty.

What I really enjoyed about this arrangement was that it had tiny vignettes within the main piece. Different points of interest within one big floral display.

leftside.final.cu.jpg
Lots of love everywhere.

Lots of love everywhere.

A bounty of autumn.

A bounty of autumn.

Use what you have. But most importantly, use your imagination and heart.

Let the leaves fall where they may. And may they fall beautifully, spreading the love across your autumn table.

 
DP-stirredwlove-ID1.jpg

Blush Roses - A Display of Order & Whimsy

I haven’t been traveling into the city lately. Much to my sadness, since the urban jungle definitely energizes me. Things to do. People to see. You know, the pulse. The visual impact. The pace. The unusual. The swirl of life.
So, no city, no train, no Grand Central, no flower buying from Dahlia.
Woe is me.

But wait, no need to fret, if my schedule isn’t cooperating just check on others' availability. “Hello, hubby? What are your plans for today?”

Such was my fortune this past week, when JuanCarlos’ meetings took him into the city. Yeah, hurray for me! I didn’t give him any specifics. No flower type. No color preference. I just shouted out from the car as I dropped him off “Get me flowers!…” Please.

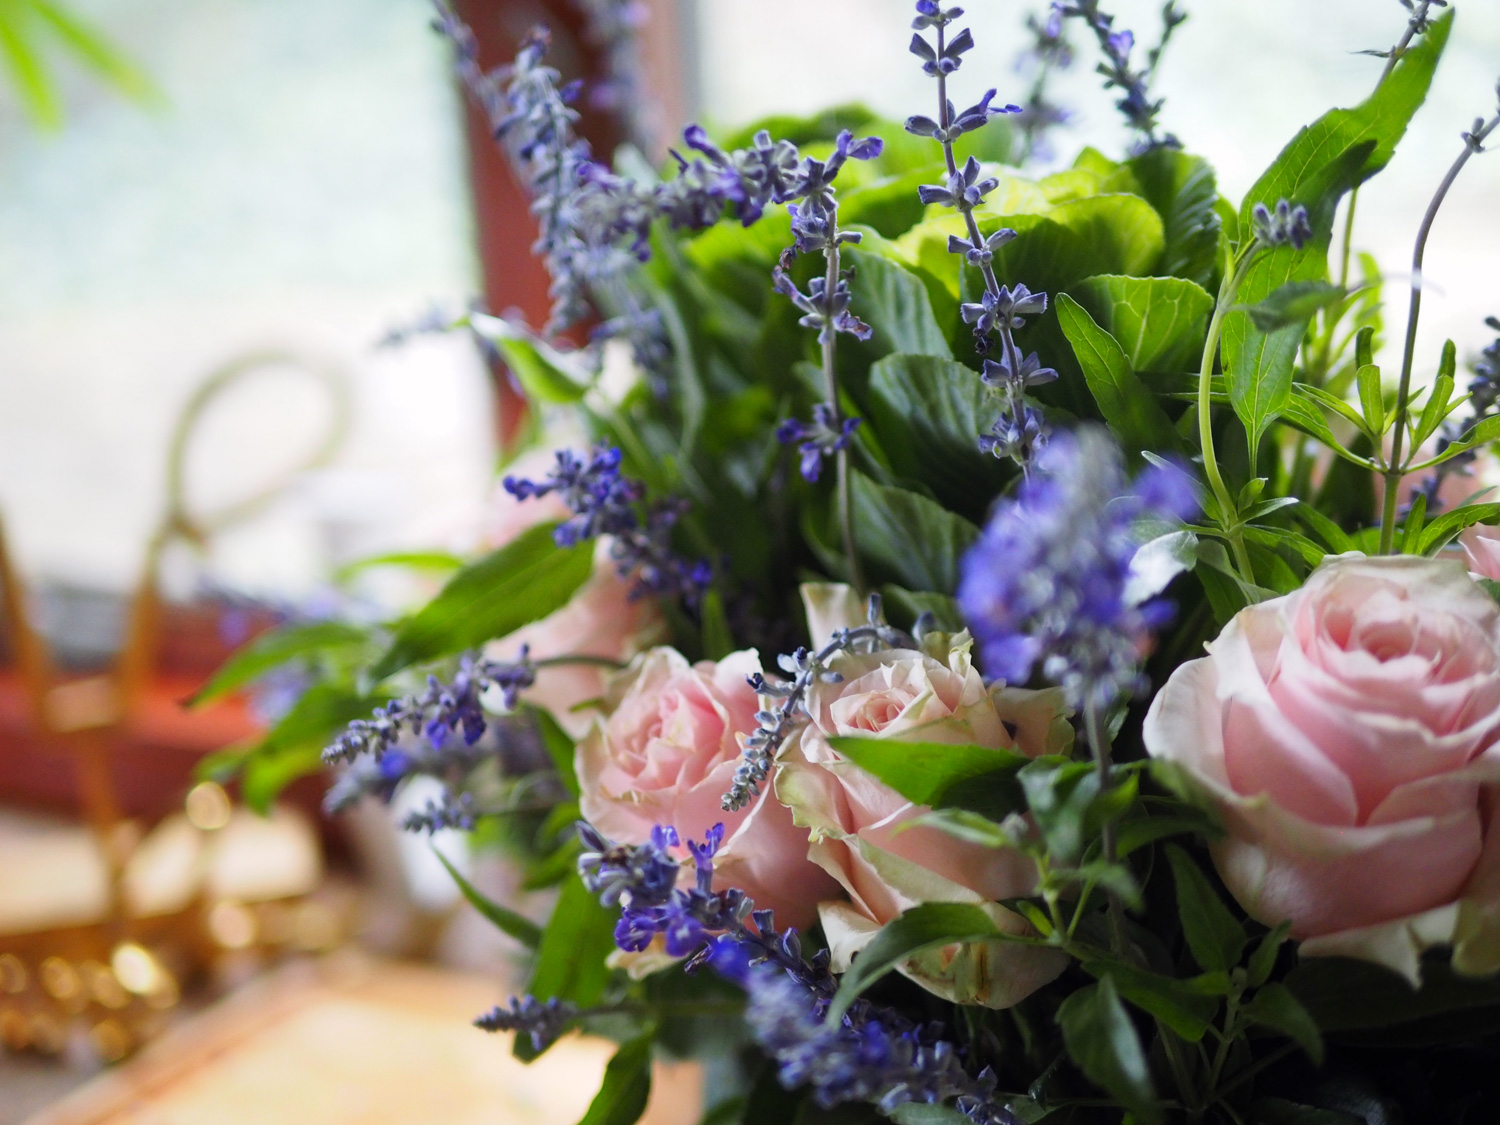
And so he obliged. He has good taste, so I knew his choices would be solid. He is a designer after all, so he had that in his favor. With no flower type in mind, he gazed at his options and as usual sunflowers first caught his eye. He adores their big yellow faces. Yet he knew I would want more than just sunflowers to work with. It was the soft color of the roses that lured him in. Soon after he grabbed some green by the way of Kale cabbage stalks and a pop of purply blue from Salvia.

Lucky me. When I saw his choices, I blushed with glee. They gave me a sense of calm and excitement simultaneously. I was lured in, too.

Kale Cabbage stems, Salvia, Roses, patiently waiting their purpose.

Kale Cabbage stems, Salvia, Roses, patiently waiting their purpose.

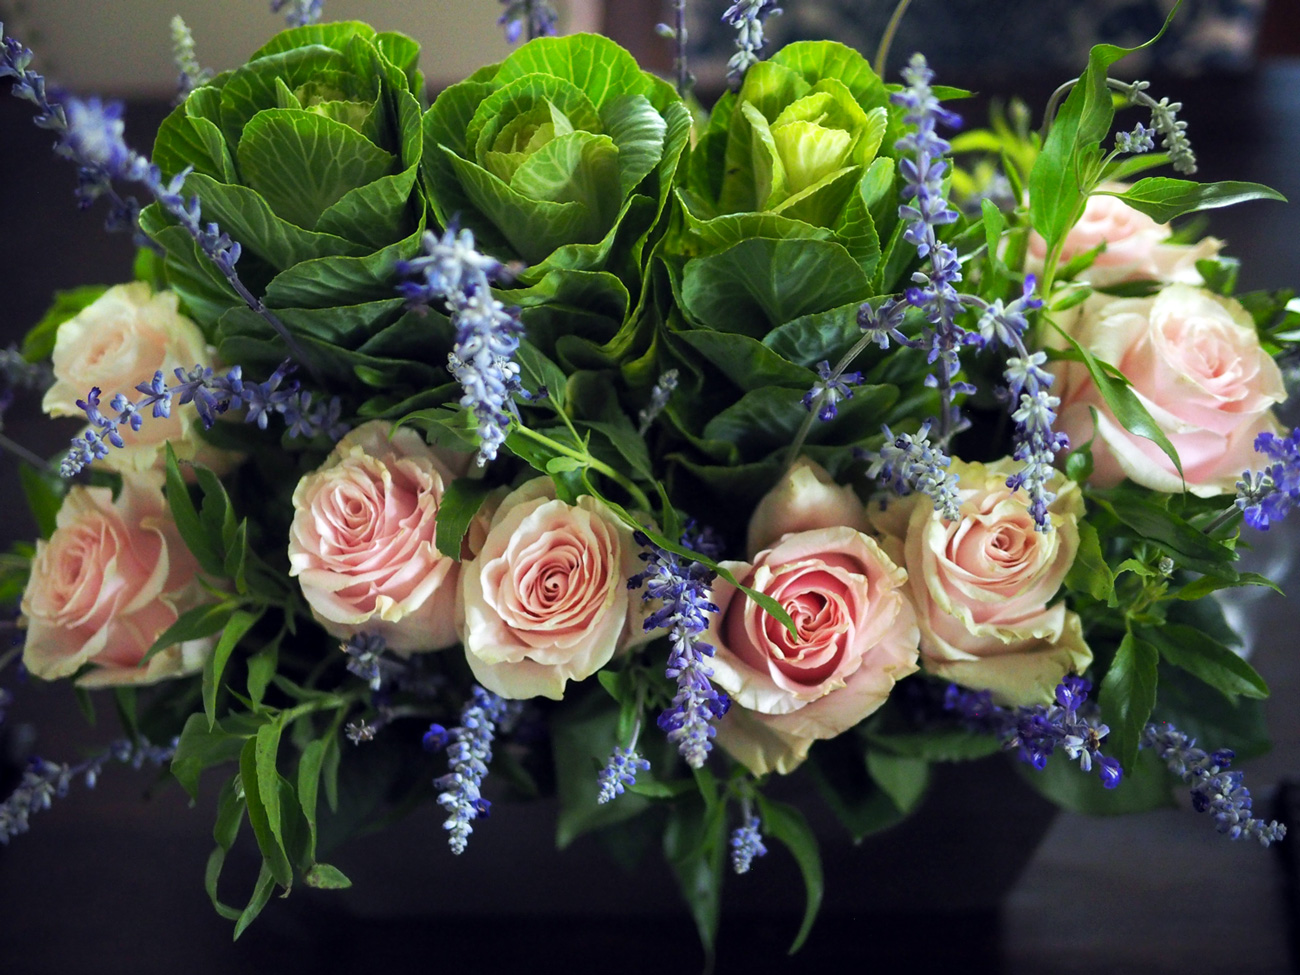
Now looking at these, even JC admitted, that the natural approach would be to leave their stems long and just nicely arrange them in a large, tall vase. But I saw something different. I saw a sense of order with a dash of whimsy. I realize that maybe I get more dreamy about things than most. They are just flowers, right?

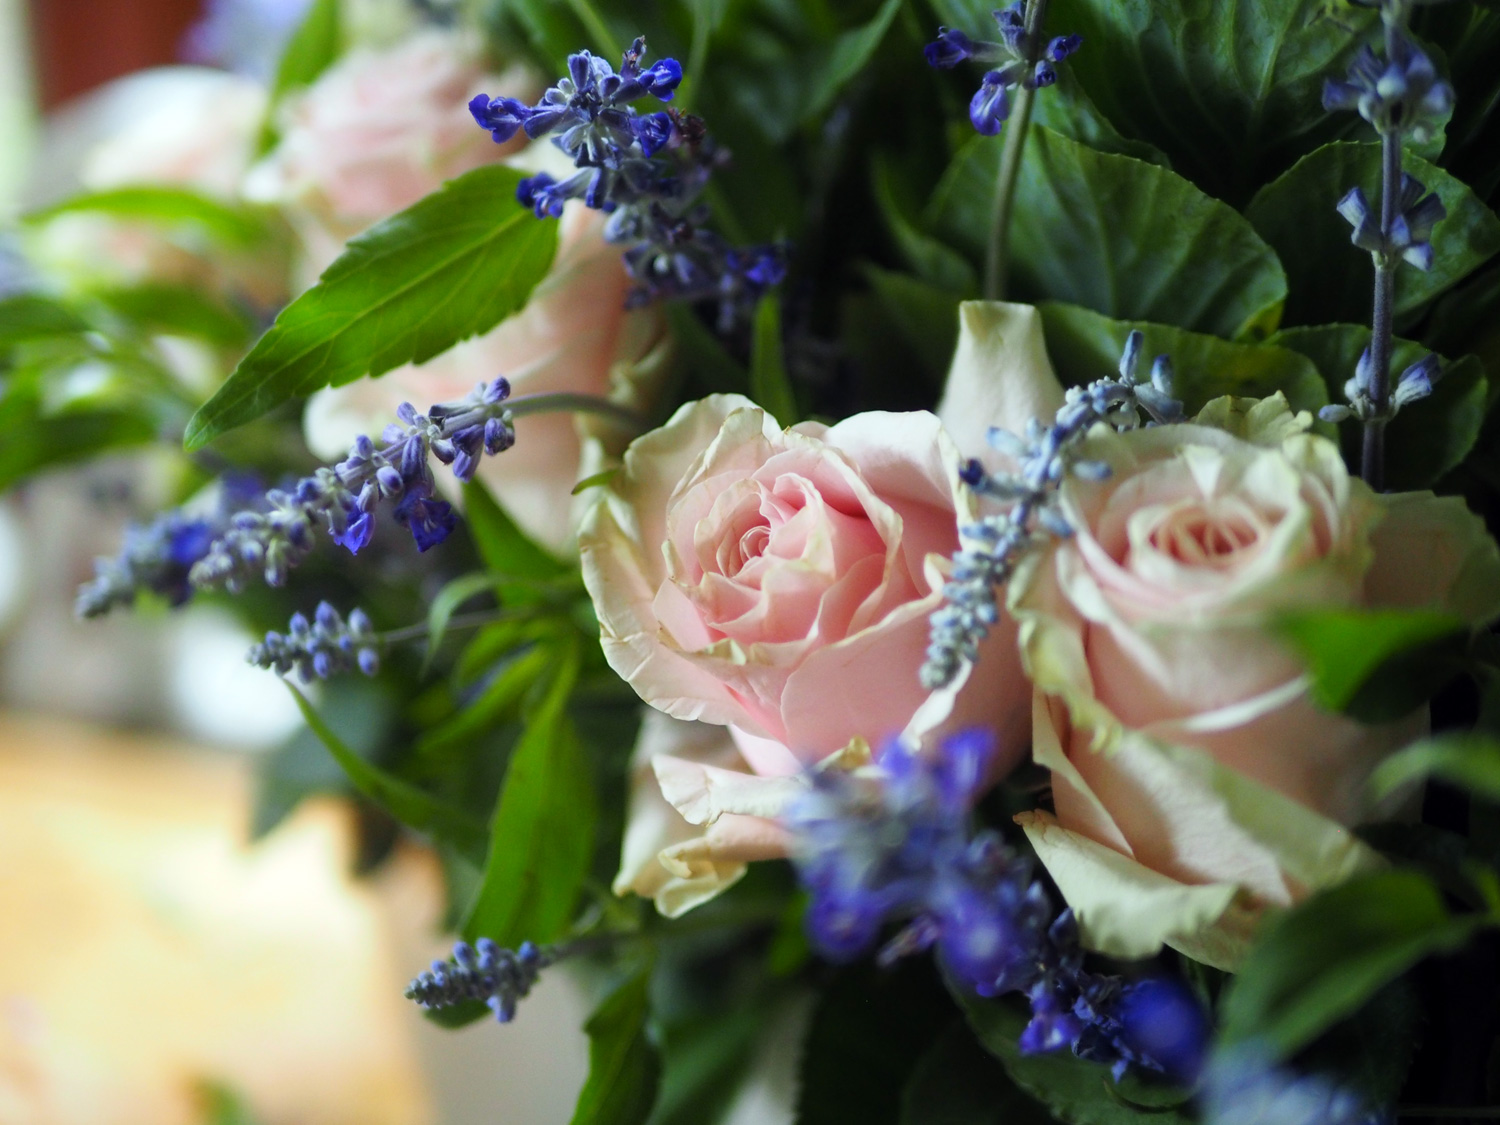
To me they are so much more. They are nature. They are beauty. They are colors and shapes and fragrances that touch my senses. I love catching their grace as I walk by them. I get such joy when I see them stand proudly showing off their natural allure and arranged in ways that showcase their special attributes. So for me, it’s not just flowers. And that especially goes for roses. I dreamed of something a bit different for these pale whispers. We have all seen roses in one big bunch a million times. Of course, they look gorgeous like that. They’re roses. Duh, gorgeous.

cu.roses.jpg

I immediately went for my metal rectangular low vessel and knew it would be a good fit.

Using frogs, those spiky plates that help flowers stay exactly where you want them, I placed the cabbage stems in an orderly row that be the center point of the arrangement.

I have three different types, and used all three for this arrangement due to the long length of the vessel.

I have three different types, and used all three for this arrangement due to the long length of the vessel.

Like little baby cabbage heads.

Like little baby cabbage heads.

The ‘stay where I put you’ stand.

The ‘stay where I put you’ stand.

Standing tall and sturdy.

Standing tall and sturdy.

Once I placed the cabbage stalks into the vessel, I found the right height for the roses so their tops hit just above the bottom of the cabbage leaves. Then using that as a guide, I cut all the rest of the roses to the same length. Next, I began lining up the roses around them like a moat around a castle. Thus, building on that theme of ‘order’ I had in mind.

Using my first rose to guide me for all the rest.

Using my first rose to guide me for all the rest.

Different heights create more dimension.

Different heights create more dimension.

Onto the whimsy. By placing the Salvia in and around the entire arrangement, peeking out they created a weeping, breezy feeling, softening the hard lines of all the ‘order’. Plus, added a contrasting color punch.

roses.cu3.jpg


Little note; when I cut the Salvia to size, the bottom part of the stems still had greens. I used those to fill in the spaces and create volume.

Nothing wasted.

Everything gained.

stems.jpg
purple.flowers.cu.jpg
roses.cu2.jpg
roses.overhead.jpg

I love this sweet arrangement. Ordered whimsy. I know I am showing a ton of different shots but I can’t seem to get enough of all the pretty angles.

Although I placed it on our dining room, I created the arrangement in the kitchen. All the while I kept getting glimpses of the giant golden LOVE sign my dear friend, Dominique, gave me.

roses.final4.jpg
See the faint lines of love in the background?

See the faint lines of love in the background?

Clearly, love shows up often in my home.

Clearly, love shows up often in my home.

I couldn’t help but think of her as I made this pretty in pink beauty and giving thanks to her friendship, her thoughtfulness and feeling blessed to have her in my life. She definitely represents order and whimsy. She gets stuff done and has fun doing it. Top that with a cosmic giggle as I rejoice on sharing this post precisely now, since tomorrow, September 15th, is her birthday. Here’s to blushing with joy on all the goodness you bring to the world, and to my life… with golden LOVE. Happy Birthday, Dominique!

Love.sign2.jpg
 
DP-stirredwlove-ID1.jpg

Lime Zest Cookies with Raspberry Filling

lime.zest.final3.jpg

For years I have been making these Lime Zest cookies. It actually all started years ago when my dear friend Donna asked me to make cookies for her wedding as part of the guest gift bag. What an honor. When you think of weddings, you think of white. Well, at least I do. So I naturally wanted the cookies to have a white motif, and from all the ones that I had chosen I needed one more cookie that would deliver on that theme. I found this Lime Meltaway recipe from Martha Stewart which dusts the cookies with confectioner's sugar, thus making them white. 

Although the original recipe is not mine, I made it my own but adding a twist. The first few times I baked them I followed the recipe as is, including for the wedding. But when I needed to make a cookie for an event, this single wafer didn't seem like it would be enough. What is better than one cookie?  As my darling nephew John stated as a small tot when given one cookie, and asked 'What do you say?' (his mom hoping for Thank you) he shouted out: Two Tookies!  Exactly; two are much better than one. And even better when sandwiched together with the perfect tart compliment to lime of raspberry jam. From that moment on I have been making these cookies with my jammy, tart and sweet stamp. From that moment on, these cookies became a hit.   

Ingredients

1.5 sticks butter, room temp
1 c confectioner’s sugar (1/3 for dough & 2/3 for dusting)
Zest of 2 limes
2 T lime juice, freshly squeezed
1 T vanilla
1 3/4 c + 2 T flour
2 T cornstarch
1/4 t salt
 1 (18oz.) jar of red raspberry preserves  (seeds removed)

Instructions

1.    Using a mixer with a whisk attachment, mix butter and 1/3 c sugar until pale and fluffy.
2.   Add lime zest, juice and vanilla until combined.
3.   Whisk together flour, cornstarch, salt in a bowl and add to the butter mixture on low speed until all combined.
4.   Divide the dough into 2-3 smaller mounds and roll into 1 1/4" thick logs. Wrap in tin foil and freezer until hardened. Approx. 1/2 hour.
5.   Using a sieve, push the jam through to remove all the seeds. Then place jam in a pastry bag or plastic bag with the tip cut off and set aside until ready to fill the cookies. (Cut tip off right before filling.)
6.   Remove the logs from the freezer and cut 1/8" thick rounds placing them on a parchment lined baking sheet.
7.    In a 350 degree oven, bake for 9-12 minutes until they are barely golden.  You may need to rotate the baking sheet half way through. These are thin, delicate cookies and you want them to be tender not overdone.
8.   Remove from baking sheet and let cool on a rack.  I cut up paper bags and spread them on my dining room table. The clean up is easier after the sugar dusting. 
9.   I line the cookies in rows of pairs turning one cookie over to reveal the baked side. Then using the piping bag, dollop about 1/2 T of jam onto the turned over cookie.  Repeat on half the cookies, then top them with their pairs. I usually push all the cookies close together at this point to ready them for the sugar dusting.
10.  Using a same strainer, sprinkle the remaining 2/3 c of confectioner's sugar over all the cookies. Let the sugar set before storing them away. 

You won't need this many limes unless you are baking for an army. I make 6x the recipe during the holidays to give to my family and friends. Photo credit: asithappens.format.com

You won't need this many limes unless you are baking for an army. I make 6x the recipe during the holidays to give to my family and friends. Photo credit: asithappens.format.com

Creaming the butter with the confectioner's sugar makes it light and fluffy. Remember, this photo shows me making many batches.

Creaming the butter with the confectioner's sugar makes it light and fluffy. Remember, this photo shows me making many batches.

When you add the lime juice and zest the butter seems to break, but do not worry. It all comes together with the dry ingredients. Photo credit: asithappens.format.com

When you add the lime juice and zest the butter seems to break, but do not worry. It all comes together with the dry ingredients. Photo credit: asithappens.format.com

A moment of zen. Photo credit: asithappens.format.com

A moment of zen. Photo credit: asithappens.format.com

There are several key pointers that I want to share about making these cookies.

  • Roll the dough into logs ensuring that there are no air pockets in the middle. (The first time I made and cut these I noticed that the lime juice creates air pockets and each cookie had a tiny hole in the middle. To avoid that, just roll and push the dough together and roll again into the log.

  • Roll the logs evenly and equal size.

  • Freeze the dough log so you get a clean cut without squashing the log. Use a sharp knife.

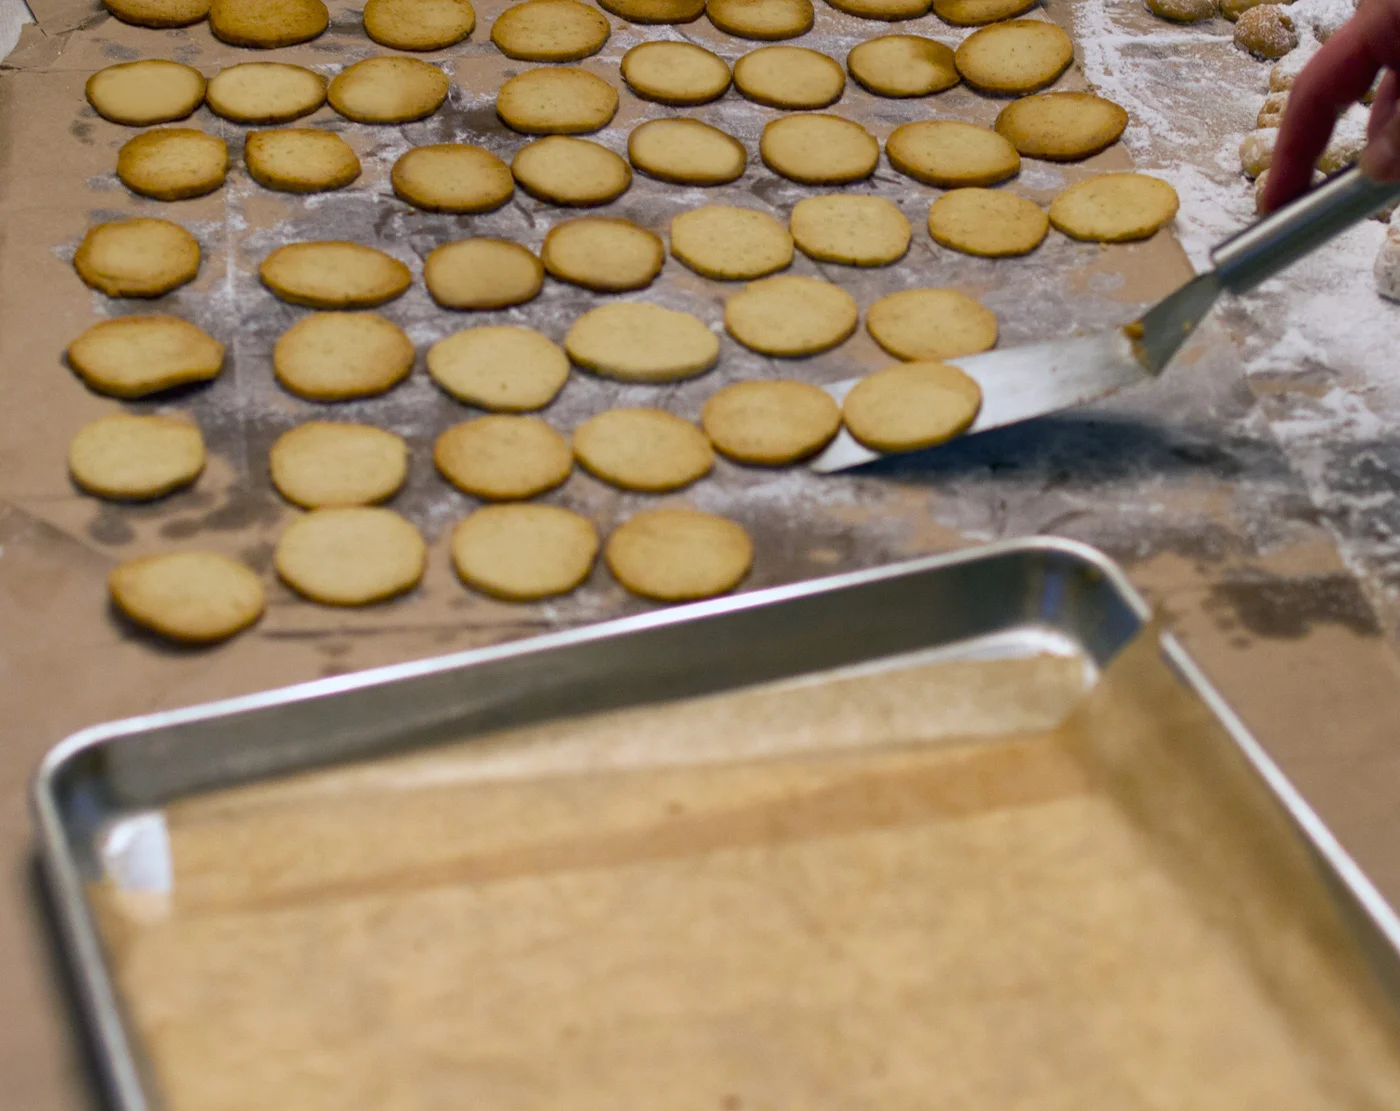
  • Remove the cookies carefully from the baking sheet. They are very delicate when they first come out.

  • Try to match up your cookies so each sandwich consists of two equally sizes cookies. (I know this may sound like the words of a crazy, controlling person but if you don't want jam oozing out because one cookie is bigger than the other, then hear me out. I have a method that ensures the cookies are good matches. When I place them on the sheet to be baked I place them in exact order that I cut them so each slice is next to the one before it. Then when I remove them, I do the same. This way similarly sized cookies will be together making it easier to match up when you sandwich. I know this sounds nuts and might not be an issue for you, but when you are selling your cookies or presenting them at an event perfection is expected. Heck, when you are serving them to guests they should look pretty, too.)

Freezing the dough makes cutting so much easier. I eye ball the width trying to ensure each cookie is the same size, about 1/8".  Photo credit: asithappens.format.com

Freezing the dough makes cutting so much easier. I eye ball the width trying to ensure each cookie is the same size, about 1/8".
Photo credit: asithappens.format.com

Use parchment paper and give them a little space between. They don't grow that much. I usually get 5 across on a half sheet pan.  Photo credit: asithappens.format.com

Use parchment paper and give them a little space between. They don't grow that much. I usually get 5 across on a half sheet pan.
Photo credit: asithappens.format.com

These are delicate cookies when they come out of the oven. When removing them from the pan, be gentle when placing them to cool. Photo credit: asithappens.format.com

These are delicate cookies when they come out of the oven. When removing them from the pan, be gentle when placing them to cool. Photo credit: asithappens.format.com

I always try to find the most efficient way to accomplish a task. Putting the jam in a piping bag or a plastic bag makes it easier to dollop onto each cookie.  Photo credit: asithappens.format.com

I always try to find the most efficient way to accomplish a task. Putting the jam in a piping bag or a plastic bag makes it easier to dollop onto each cookie.
Photo credit: asithappens.format.com

After they are lined up, turn one row over so you are filling the baked side with jam. Then the outside of the cookie looks nice when sandwiched together.  Photo credit: asithappens.format.com

After they are lined up, turn one row over so you are filling the baked side with jam. Then the outside of the cookie looks nice when sandwiched together.
Photo credit: asithappens.format.com

sandwich.cookies2.jpg
Jam it up and sandwich it up. Photo credit: asithappens.format.com

Jam it up and sandwich it up. Photo credit: asithappens.format.com

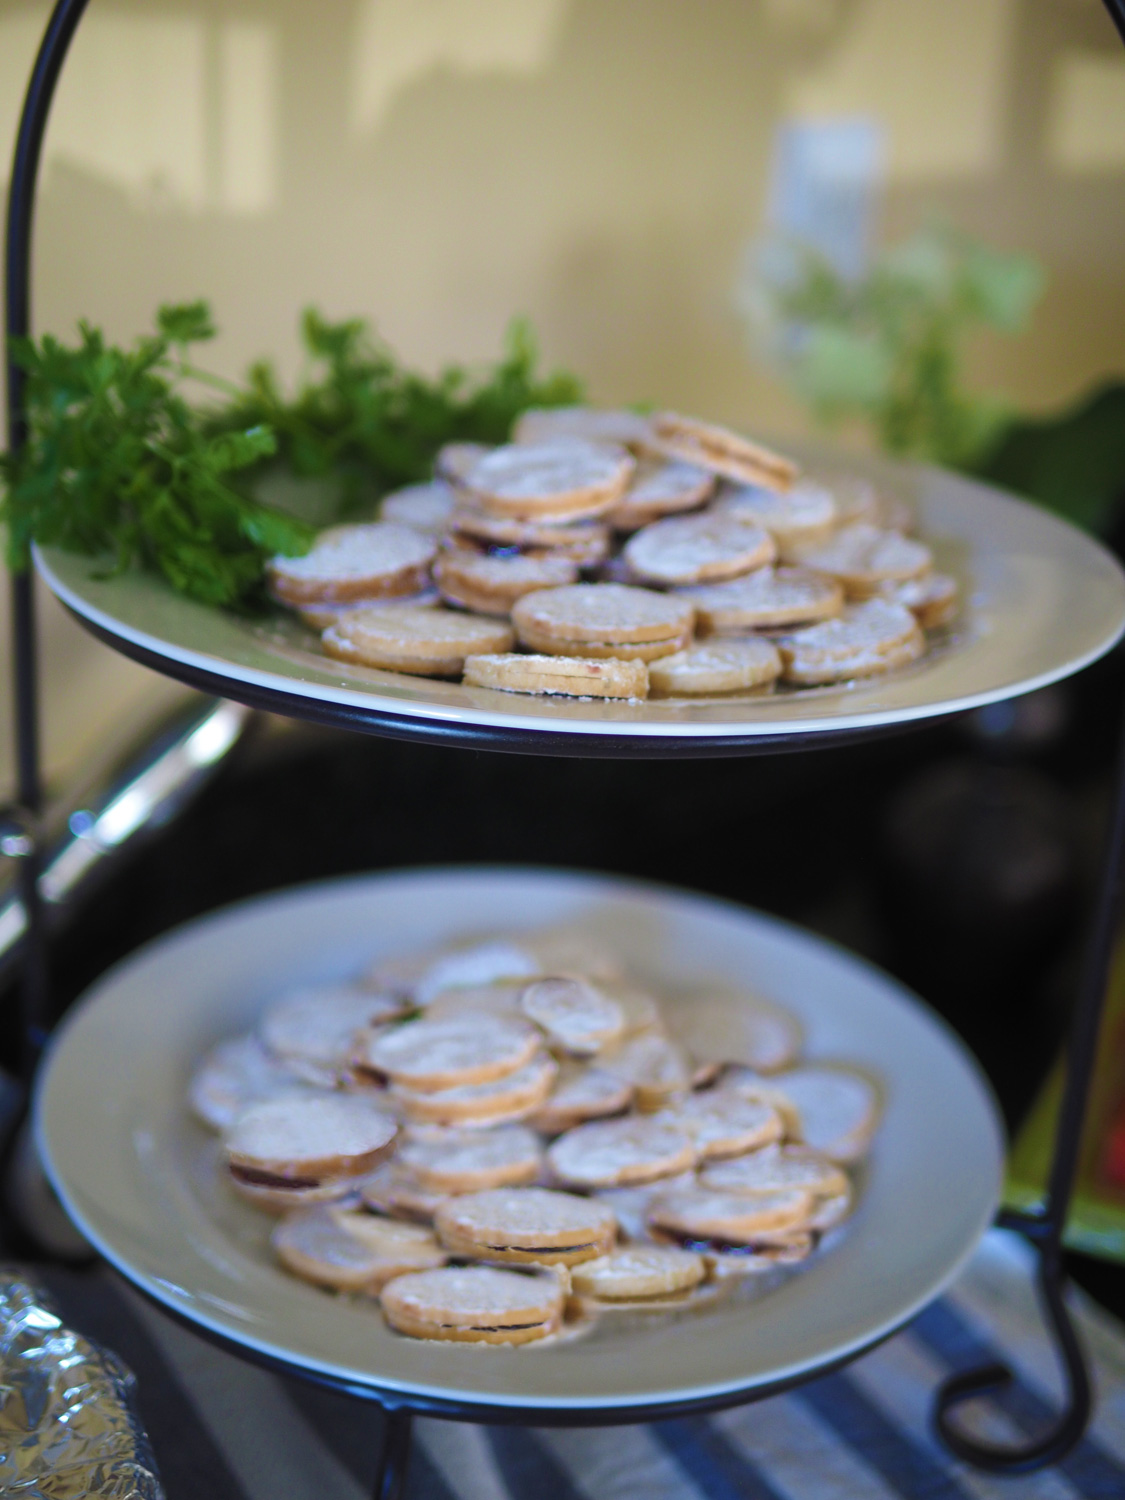
Like snow, let the sweetness fall and cover with a good dusting. Photo credit: asithappens.format.com

Like snow, let the sweetness fall and cover with a good dusting. Photo credit: asithappens.format.com

Photo credit: asithappens.format.com
And just like that they begin to disappear. Photo credit: asithappens.format.com

And just like that they begin to disappear. Photo credit: asithappens.format.com

I always get a thrill out of watching the faces of people when they try these cookies for the first time.  They can't quite make out that the zingy flavor is lime, because who would expect that in a cookie.  Then they smile with tartness of the raspberry jam finished with the sweetness from the powdered sugar dusting.  It's a perfect combo.

As you can see these cookies have that snowflake feeling. White and delicate, they were perfect for Donna and Jeff's wedding. Thank you Donna for asking me to be a part of your joyous celebration, and thus finding another cookie tradition that everyone loves.

Me, Donna & JC at her wedding. Doesn't she look happy & beautiful! And not because of the cookies.

Me, Donna & JC at her wedding. Doesn't she look happy & beautiful! And not because of the cookies.


I usually make them as part of my Christmas cookie offering but recently these have been requested for two different catering events.  They were, and are universally loved.  I hope you give them a try whether it be for your own sweet tooth need with tea, or to share with your guests.

My Christmas cookie box.

My Christmas cookie box.

As part of a catering event's mid afternoon dessert offering in the Hamptons.

As part of a catering event's mid afternoon dessert offering in the Hamptons.

At a luncheon for my Mother's Ladies Group

At a luncheon for my Mother's Ladies Group


Sunday Blues - of the Soothing, Swooning Kind

blue.table2.jpg

So the story goes... I needed to go to IKEA.  You must be wondering why, since I don’t need another napkin or tablecloth, dish or candle, or anything for that matter.  But alas, we did need a new patio table. Pause a moment, to digest the thought that we are replacing our 17 year old IKEA teak table with the exact same table. Not only proving the enduring quality of some of IKEA’s items, but lo and behold, the table's solid quaility has kept it on their selling list after all these years.  Since we loved it so much, why mess with a good thing.  And that was what steered my vehicle to IKEA.

The brand, spanking new IKEA table. And it was the very last one standing in the aisle. I totally lucked out.

The brand, spanking new IKEA table. And it was the very last one standing in the aisle. I totally lucked out.
Now, I'm sure many of you have wandered through IKEA and know that there is only one route... the one they force you to take through the entire store.  Naturally, on my search for the table, I picked up a few other items along the way.  It’s one of those stores where you say, “oh, this is only $5, and that is only $3”. But by the time all your items roll down the conveyor belt into the big blue plastic IKEA bag you just purchased (again) to carry home your 'stuff', it is too late and the complete and utter sticker price shock of the final total hits, and hits hard.  Every dollar truly does add up, my friends. It’s a brilliant tactic.  Price a bunch of stuff low, creating a false 'inexpensive'  buying experience and then when the customer hasn't realized it they just spent a fortune in your store.  There is a sucker born every day, and I was born again on that day.

In filing up of my big blue bag, I happened upon blue and white dish towels. Why? you ask. Didn't I just say I don't need another thing?  Well, because I am drawn to simple, pretty things.  I can’t tell explain exactly why, but I absolutely adore the stark contrast of blue against white. Like a vision of some Greek village. It makes my knees buckle.  So I bought two packs. I wasn’t sure if I would make pillows out of them.  Use them as actual dish towels? Incorporate them into one of my apron designs?  I just had to have them.  It’s a sickness, I fully recognize that.  Who gets swoony over dish towels?  Apparently... ME.

I did none of the above with them. Instead they came to the rescue in another way. We were hosting a BBQ this past Sunday and since I was feeling quite under the weather I didn't have a tablecloth plan.  Literally 1 hour before the guests arrived I still had decided what the table would look like. These dish towels would now become napkins that would grace my outdoor table-scape.  I guess my hubby knew that blue and white swoons me because when I asked him to pick me up flowers in the city at Dahlia, what did he choose? Blue and Whites.  It was fate.

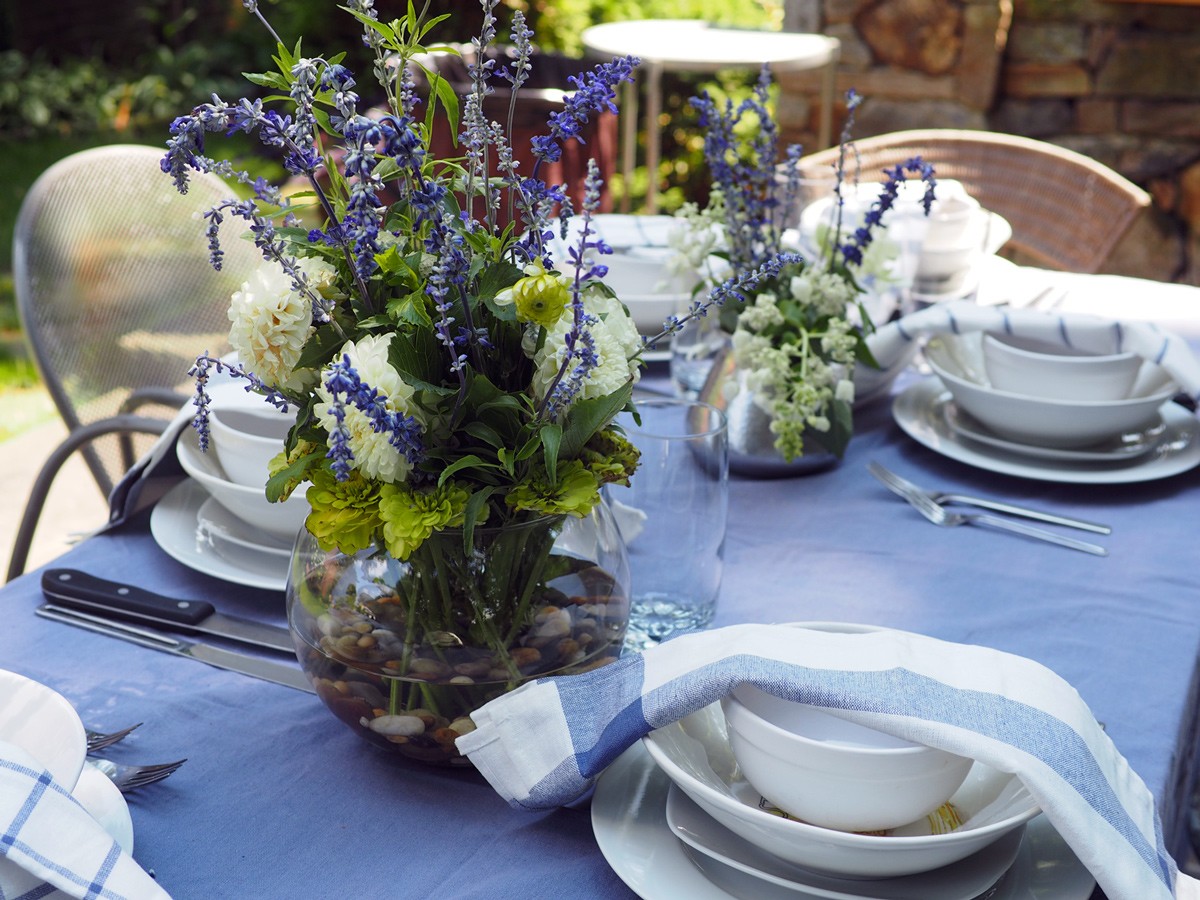
3 arrangements lined the center table and created a harmony of blue.

3 arrangements lined the center table and created a harmony of blue.

placesetting.jpg

As I unrolled the dish towels, I realized each one was a different graphic design, and if even possible, I loved them that much more. So my need for high contrast, plus my obsession with not being matchy-matchy was thoroughly satisfied. A cornflower blue tablecloth tossed down, white dishes stacked up in order of food served, topped with blue and white IKEA dishtowels twisted once pluse florals to repeat the theme... I’d say Sunday afternoon blues are feeling just fine.

A single, simple twist of the 'napkin' placed over the stack of dishes creates an laid back vibe. LOVE LOVE LOVE the different graphic pattern and how easy and casual it makes it all feel.

A single, simple twist of the 'napkin' placed over the stack of dishes creates an laid back vibe.
LOVE LOVE LOVE the different graphic pattern and how easy and casual it makes it all feel.

Zucchini Crudo

Zucchini Crudo

Cucumber/Smoked Trout rounds are easy.  Chop the trout into small pieces, mix with sour cream, using a scoop dollop onto a slice of cucumber and top with more sour cream.

Tomato & Mozzarella Tart

Tomato & Mozzarella Tart

Cucumber topped with smoked trout & sour cream

Cucumber topped with smoked trout & sour cream

InterMezzo
Steamed Mussels with ciabatta

Steamed mussels with herbs, garlic and wine.

Steamed mussels with herbs, garlic and wine.


First course
Pasta with fresh herbs & garlic, grated Parmigiano Reggiano & Roasted Tomatoes

Main Course
Grilled Iberíco Pork Shoulder & End Loin  
Grilled Langostinos
Corn on the Cob
Nectarine/Corn Arugula Salad

Presa Iberíca and Pluma Iberíca are pork should and end loin cuts from Iberíco pigs. The pork is marbled with flavorful fat that melts in your melt like no other. You can buy them these frozen only at Despaña SoHo.

Presa Iberíca and Pluma Iberíca are pork should and end loin cuts from Iberíco pigs. The pork is marbled with flavorful fat that melts in your melt like no other. You can buy them these frozen only at Despaña SoHo.

Large and juicy, langostinos on the grill are divine.

Large and juicy, langostinos on the grill are divine.

Nectarine and Raw Corn Salad over Arugula and Boston Lettuce with an orange/lime vinigiarette.

Nectarine and Raw Corn Salad over Arugula and Boston Lettuce with an orange/lime vinigiarette.

Dessert
Peach Cobbler
Honey Dew
Cheese/Fruit Plate
S'Mores

This is a recipe from Ina Garten

This is a recipe from Ina Garten

Creates a nice crust to crack into with warm peaches below, then served with whipped cream

Creates a nice crust to crack into with warm peaches below, then served with whipped cream

love.jpg

It was a wonderful day filled with LOVE. 
Food made with LOVE.
New  friends and old friends full of LOVE.
And blues that make you the other 's' word -  swoon


The new white marble LOVE addition to my collection was gifted to me with love by Angelica. You can never have too much.

Love is is the air. Angelica and Marcos

Love is is the air. Angelica and Marcos

JuanCarlos manning the grill, fortified with hydration. Photo credit: Angelica Intriago

JuanCarlos manning the grill, fortified with hydration. Photo credit: Angelica Intriago

Gathering around the grill with our friends from Bilboa, Spain: Ana, JuanFran, their daughters, and CecilaPhoto credit: Angelica Intriago

Gathering around the grill with our friends from Bilboa, Spain: Ana, JuanFran, their daughters, and Cecila

Photo credit: Angelica Intriago

Who doesn't love the hammock. Also, in blue and white. Photo credit: Angelica Intriago

Who doesn't love the hammock. Also, in blue and white. Photo credit: Angelica Intriago

JuanFran, quite the chef himself, giving JC a hand. Photo credit: Angelica Intriago

JuanFran, quite the chef himself, giving JC a hand. Photo credit: Angelica Intriago

We have the A-OK sign! Photo credit: Angelica Intriago

We have the A-OK sign! Photo credit: Angelica Intriago

Amore!!! Photo credit: asithappens.format.com

Amore!!! Photo credit: asithappens.format.com